
Whole House Repiping · Venice, FL
Whole House Repiping in Venice, FL
Honest assessment first, always. Licensed master plumber CFC1434139. Galvanized, polybutylene, and copper replacement — call 239-388-3631.
Call Now239-388-3631A whole house repipe is not a routine service call. It is one of the larger investments a homeowner makes in their property — right up there with a new roof or an HVAC system — and the decision to do it deserves more than a sales pitch from a plumber who showed up to look at a drip. Before I ever recommend a repipe, I want to understand why the pipes are failing, whether a repipe is actually the right answer, and if it is, what material and method make the most sense for the specific home I’m standing in.
My name is Mike Reynolds. I’m the owner of Plumbing Detectives LLC and a licensed master plumber, license CFC1434139. I’m based here in Venice and I work in homes throughout this market. The page you’re reading is my honest attempt to explain everything a Venice homeowner needs to know about repiping — when it’s necessary, when it isn’t, what it costs, what the process looks like, and what to watch out for.
I won’t recommend a repipe unless it’s genuinely the right answer for your home. That’s how I run every job and it’s how this page is written.
The Local Story
Why Venice Homes Need Repiping — The Local Story
Venice has an unusually concentrated band of homes built between the mid-1950s and the late 1970s. Venice Gardens — where the average build year is documented by Sarasota County’s own neighborhood plan as 1969 — is essentially an entire subdivision in that window. South Venice, Gulf View Estates, Pinebrook South, Jacaranda West, the original Island neighborhoods — all share this construction era. And that era matters for plumbing in a specific, verifiable way.
Homes built before the mid-1970s in this market were typically plumbed with galvanized steel supply lines. Homes built from the late 1970s through approximately 1995 may contain polybutylene. Homes built from the late 1970s through the 1990s that don’t have polybutylene typically have copper. Each of these materials has a different failure pattern and a different urgency level. Understanding which one is in your home is the starting point of any honest repipe conversation.
Venice also sits on hard water — the county’s own data confirms Sarasota County public water arrives at your tap at roughly 120 to 125 mg/L hardness even after treatment, with independent measurements showing 12 to 18 grains per gallon across the Venice/Nokomis corridor. That mineral load has been working on the inside of every pipe in every older Venice home since the day it was installed. It accelerates corrosion. It deposits scale inside supply lines and water heaters. It is one reason pipes in this market wear faster than the manufacturer’s documentation assumes.
The Mechanics Behind the Problem
Understanding Why Pipes Fail — The Mechanics Behind the Problem
Most homeowners know their pipes are old. Most don’t know exactly what old pipe is doing inside their walls. Here’s the honest explanation for each material.
Galvanized Steel — The Inside Story
Galvanized steel pipe was protected from corrosion by a coating of zinc on the interior wall. That zinc coating was always going to be temporary — it sacrifices itself to protect the steel the same way an anode rod sacrifices itself inside a water heater. As the zinc depletes, rust builds up on the interior wall of the pipe. The pipe’s internal diameter narrows progressively. Water pressure drops over months and years in a way most homeowners notice and attribute to the city supply or their fixtures, not to the pipes themselves.
One of the most common things I find in Venice’s older neighborhoods is a homeowner who mentions that their water pressure has been declining for years and they’ve never connected it to the pipe material. When I put a gauge on the street meter the pressure is fine. The drop is happening between the meter and the fixtures — inside the galvanized supply lines, which have been narrowing from the inside for fifty or sixty years.
Beyond pressure loss, galvanized corrosion produces rust-colored water — especially visible first thing in the morning or when a tap hasn’t been used overnight, when the standing water in the pipe has had time to pick up more rust from the interior wall. Eventually, when the pipe wall corrodes through, you get a pinhole leak. In galvanized pipe that’s been corroding for decades, that leak is rarely isolated — the whole system is at or near the same stage of deterioration.
Polybutylene — The Pipe That Fails From the Inside Out
Polybutylene is a gray flexible plastic pipe stamped PB2110 on the side, installed widely across Florida from roughly 1978 through 1995. It looks perfectly normal from the outside. That’s the problem. Polybutylene degrades from the inside when it’s exposed to the chlorine and chloramine compounds in treated municipal water. The chemical attack makes the pipe’s interior surface brittle and micro-cracked over time. The acetal plastic fittings — the connection points at every junction — are particularly prone to failure, often with no warning.
I’ve opened walls expecting to repair a fitting and found an entire polybutylene system with fittings that were visibly stressed, discolored, or cracked internally. The pipe looked gray and intact from the outside. The inside told a different story.
Beyond the plumbing failure risk, polybutylene has a documented insurance problem. Citizens Property Insurance Corporation — Florida’s state-run insurer of last resort — has a written underwriting rule under Rule 206.B declining new coverage for homes over 20 years old with active polybutylene piping. Most private carriers in Florida treat a four-point inspection that flags polybutylene as grounds for automatic decline. A home with active polybutylene that cannot obtain standard homeowner’s insurance cannot be financed conventionally — which affects both the owner’s coverage options and the home’s marketability at resale.
Copper — The Pinhole Problem
Copper became the Florida residential standard as galvanized gave way in the 1960s and 1970s. It’s a better material than galvanized steel — more durable, cleaner, and not prone to the same internal rust buildup. But copper has its own failure mechanism in this market: pinhole leaks.
Pinhole leaks in copper develop at points of internal corrosion driven by water chemistry — the dissolved minerals, chloramine treatment, pH variability, and in some homes microbial activity in the water. They appear first as isolated spots, then as a pattern. One of the most common things I find in Venice homes with late 1970s and 1980s copper is a homeowner who has patched two or three pinhole leaks in the past few years and is starting to wonder what’s next.
In Florida slab construction, copper supply lines were frequently laid directly in or under the concrete without protective sleeving. Unsleeved copper in direct contact with concrete is subject to corrosion from the outside as well as the inside — concrete’s slight alkalinity, the moisture that migrates through it, and the mineral salts in Florida’s sandy limestone soil all contribute. A pinhole leak in unsleeved under-slab copper is not a simple repair. Cutting the slab to access the pipe is expensive and disruptive. The alternative — rerouting overhead through the attic — is the same method used for a full repipe, at roughly similar cost for that section of pipe.
Industry guidance consistently cited in the Southwest Florida market puts the threshold for considering repipe over ongoing spot repair at three or more pinhole leaks within a six-month window. That’s the point where the pipe as a system is deteriorating rather than having isolated defects. I use that threshold as a conversation starter, not a rigid rule — what I actually look for is whether the leak pattern indicates systemic failure or localized damage.
CPVC — The Aging Concern
Chlorinated polyvinyl chloride, usually called CPVC, was installed in some Florida homes from the mid-1970s through the 2000s as an alternative to copper. It’s still an approved material under the Florida Building Code and performs well when installed correctly. The concern with older CPVC — particularly installations from the 1980s and early 1990s — is brittleness. CPVC becomes more brittle as it ages and as it’s exposed to Florida’s heat cycling. The glued joints can develop micro-fractures. A CPVC pipe that feels intact can crack under the impact of nearby construction, a heavy object dropped on a wall, or even aggressive water hammer. I’ve been called to Venice homes where a repair was attempted on old CPVC and the attempt to cut the pipe caused it to crack several inches away from the cut — the pipe was too brittle to work with without risking additional failures nearby.
The Honest Answer
Do You Actually Need a Whole House Repipe?
This is the most important section on this page. I’ll be direct.
No — a repipe is not needed in these situations:
A single isolated pinhole leak in copper pipe that’s otherwise in good condition. If I pressure test the system and it holds, if the leak is genuinely isolated and the rest of the copper looks healthy, a targeted repair is the right answer and I’ll tell you that.
A water pressure problem that originates at the pressure reducing valve or the main shutoff valve, not the supply lines themselves. I’ve been called to homes for “low pressure” that turned out to be a partially closed valve that nobody had touched in fifteen years.
A water quality or taste issue that traces to the water heater anode rod or the treatment plant, not the pipes. Don’t repipe a house because your hot water smells — that’s almost always a different, much cheaper fix.
Minor issues that can be addressed with targeted repairs without compromising the integrity of the rest of the system.
Maybe — these situations warrant a closer evaluation:
Two pinhole leaks in copper within the past year, especially in a home built before 1990. This may or may not indicate systemic failure. A pressure test and visual inspection of accessible pipe sections give me a better answer.
A home with polybutylene that has had no leaks but is approaching the age range where failures become more common. The insurance conversation is real and worth understanding even if the pipes haven’t failed yet. This is a case where I’d rather explain the situation clearly and let the homeowner decide, rather than push urgency that may not be warranted yet.
Galvanized supply lines in a home where pressure has declined but the pipes haven’t failed. Galvanized in the 50-to-65-year range is past its expected service life but may still be functional. The right question isn’t just “are the pipes old” — it’s “what is the trajectory, and what happens when they do fail in this specific home?”
A mix of pipe materials from different eras or different repair jobs over the years. Homes that have had multiple plumbers over the decades sometimes end up with patchwork systems — some copper, some CPVC, the occasional section of newer PEX where a repair was done. Understanding what’s where and what the weakest link is requires a proper assessment, not a generic answer.
Yes — a full repipe is genuinely the right answer in these situations:
Active polybutylene throughout the home, especially if the home is over 20 years old and the homeowner needs insurance coverage or is planning to sell. The Citizens underwriting rule is a hard line. Most private carriers treat polybutylene the same way.
Three or more pinhole leaks in copper within a six-month window, particularly in under-slab sections where each repair is invasive. At that threshold the copper system is deteriorating, not having isolated failures.
Galvanized supply lines that are 50-plus years old with significant pressure loss and discolored water. At this point the pipes have been corroding for half a century. The question is no longer whether they’ll fail but when, and whether you want to make that decision on your timeline or theirs.
A home where the previous owner did multiple partial repairs and patch jobs over the years and the system is now a maze of different materials, ages, and connection methods. These patchwork systems are harder to troubleshoot, harder to insure, and harder to sell.
Not sure which category your Venice home falls into? I’ll assess the full system — pressure test, visual inspection of accessible pipe sections, review of any existing repair history — and give you a straight answer. Call 239-388-3631.
Call Now239-388-3631An Honest Comparison
Repipe Material Options — An Honest Comparison
When a repipe is the right answer, the next question is what to put in. Here’s my honest take on the options.
PEX-A — The Standard for Most Venice Homes
PEX stands for cross-linked polyethylene. PEX-A is manufactured using the Engel method, which produces a higher degree of cross-linking — about 80 percent — and a pipe with better flexibility, freeze resistance, and shape memory than other PEX variants. PEX-A uses expansion fittings rather than crimp rings: the pipe end is expanded, the fitting is inserted, and the pipe contracts back around the fitting as the material’s memory pulls it tight. The connection actually improves over time as the pipe relaxes into full contact with the fitting.
In the Southwest Florida market, PEX-A with Uponor ProPEX expansion fittings is the material most regional repipe companies specify for production work. It’s flexible enough to run through existing wall and attic cavities with minimal drywall cutting. It’s resistant to scale buildup from hard water in a way that metal pipe is not. It carries a 25-year limited warranty from Uponor and a manufacturer’s track record in this environment. For a Venice slab home with an overhead repipe through the attic, PEX-A is the material I use and recommend for most jobs.
PEX-B — The Budget Alternative
PEX-B uses a different manufacturing method and achieves a lower degree of cross-linking — about 65 to 70 percent. It’s stiffer than PEX-A, which makes it somewhat less ideal for threading through tight attic and wall cavities, and it uses crimp or clamp fittings rather than expansion fittings. It’s less expensive than PEX-A on materials. For a straightforward repipe with good access and simpler routing, PEX-B is a legitimate option. It’s not my first choice in a complex Venice attic layout, but it’s an honest alternative worth discussing if budget is a significant constraint.
Copper — The Premium Option
Copper Type L is a proven, time-tested material that has been the residential plumbing standard for decades. In the right conditions it lasts a long time and performs reliably. The considerations for using copper in a Venice repipe are cost — copper materials run roughly 40 to 50 percent more expensive than PEX-A across comparable home sizes — and the hard water factor. Venice’s water at 12 to 18 grains per gallon will continue to work on copper supply lines via the same chemistry that caused pinhole leaks in the original copper. A copper repipe is a legitimate choice for homeowners who want the premium option, particularly in higher-end homes where the material cost is a smaller percentage of the overall project budget. I’ll be honest about whether copper makes sense for a specific home rather than default to it as the premium upsell.
CPVC — Still Code-Approved, Not My Recommendation
CPVC is still listed in the Florida Building Code as an approved potable water supply material. For that reason I won’t tell you it’s wrong. But given the brittleness issues I’ve personally observed in older CPVC installations in this market — and given that PEX-A outperforms it in flexibility, freeze resistance, and long-term field performance — I don’t recommend CPVC as the primary repipe material for most Venice homes. If a homeowner has a strong preference for CPVC, I’ll explain my concerns and let them decide.
Quick Reference
Pipe Material Quick Reference — What’s Likely in Your Venice Home
| Pipe Material | Typical Lifespan | Common Failure Mode | Typical Venice Home Age | Status |
|---|---|---|---|---|
| Galvanized Steel | 40–50 years | Internal rust buildup narrows the pipe diameter over decades, causing pressure loss, rust-colored water, and eventual wall failure | Pre-1975 | Past expected service life in most Venice homes. Replacement strongly recommended. |
| Copper (Type L) | 50–70 years | Pinhole leaks driven by water chemistry corrosion — accelerated by hard water and unsleeved under-slab runs | 1970s–1990s | Late 1970s–1980s copper now entering the pinhole risk window. Evaluate by leak pattern, not age alone. Note: Type M copper (thin-wall, used in heating systems) should never have been used for potable supply — homes with unexplained early pinhole failures may have had Type M installed incorrectly. |
| Polybutylene (PB2110) | 25–40 years (unpredictable) | Internal chloramine degradation makes the pipe brittle from the inside. Acetal fittings fail suddenly with no visible warning | 1978–1995 | Active insurance liability. Citizens Rule 206.B applies. Full replacement is the standard recommendation. |
| CPVC | 50+ years when installed correctly | Brittleness increases with age and heat cycling. Pipes can crack during repair attempts rather than at the defect | 1980s–2000s | Older CPVC becoming increasingly brittle in this market. Evaluate carefully before attempting repairs on aging installations. |
| PEX-A | 50+ years | No documented systemic failure in this market at current installed age | 2000s–present | Current repipe standard in Southwest Florida. Scale-resistant, flexible, 25-year manufacturer warranty. |
| PEX-B | 50+ years | No documented systemic failure in this market at current installed age | 2000s–present | Common in production building. Slightly stiffer than PEX-A, uses crimp fittings rather than expansion. Legitimate alternative at lower material cost. |
Note: Lifespans are general guidelines, not guarantees. Venice’s hard water at 12 to 18 grains per gallon and coastal environment accelerate wear on all metal and older plastic pipe materials compared to softer-water, inland markets. A proper field assessment tells you more about your specific home than any general table.
Start to Finish
How a Repipe Actually Works — The Process From Start to Finish
Here’s the timeline at a glance before we get into the details: I can usually get out for the initial assessment within a day or so of your call, depending on the schedule. Once you approve the written quote, most Venice repipes get on the calendar within a week or two — sooner when the situation is urgent, like an active leak, a four-point inspection deadline, or an insurance renewal date. The repipe itself takes two days for most standard Venice slab homes, with water restored by the end of each day.
This is the section most homeowners actually need. The idea of repiping a house feels overwhelming before you understand what it actually involves. Here’s exactly what happens.
Step 1: Diagnosis and Assessment
Before I quote a repipe, I want to understand what’s in the home. That means looking at visible pipe sections under sinks, in the utility room, in any accessible crawl space or attic. It means doing a pressure test if the situation warrants it. It means reviewing any repair history the homeowner knows about. It means identifying the pipe material, the approximate age, and the failure pattern I’m seeing.
I also want to understand the home’s layout — how many bathrooms, where the fixtures are, what the attic access looks like, whether there are any areas without attic coverage. That information determines the scope, the routing, and the cost of the repipe.
Step 2: The Written Estimate
After the assessment I provide a written, flat-price estimate. It covers materials, labor, permit, and drywall patching for the access cuts the repipe requires. There are no surprises after the job starts. If I find something unexpected during the work — a section of pipe that requires a different approach than anticipated — I call before I proceed.
Once the quote is approved, we get you on the schedule — typically within a week or two, and faster when there’s an active leak, a four-point inspection deadline, or an insurance renewal date driving the timeline.
Step 3: Permit
Every whole-home repipe in Venice requires a permit. City of Venice properties permit through the City of Venice Building Department at 401 W. Venice Ave — permit fee is $90 base plus project valuation calculations. Sarasota County properties permit through Sarasota County Planning and Development Services. We pull the permit before work begins and coordinate the inspection schedule.
Some homeowners are concerned about the permit — they worry it adds cost or complicates the job. The truth is the permit protects the homeowner. The rough-in inspection, where the inspector verifies the new pipe installation before walls are closed, is the documentation you need for your insurance company, for a future home sale, and for the four-point inspection that Florida homeowners routinely face at renewal. Skipping the permit saves a small amount of money and creates a large problem.
Step 4: Protecting the Home
Before any work starts, furniture and flooring are protected. In a Venice home where the repipe runs through the attic, most of the work happens overhead rather than in the living space. We identify the access point locations — typically small openings at fixture stub-out points — and protect the surrounding area before cutting.
Step 5: The Overhead Repipe
The standard method for a Venice slab home is an overhead repipe. The existing supply lines — galvanized, polybutylene, or failed copper — are abandoned in place or removed where accessible. New PEX-A lines are run through the attic and down the walls to each fixture location. Stub-outs at each fixture are terminated in the wall at the correct height and position. The system is designed so every fixture has a dedicated cold and hot supply, properly supported, properly sleeved where penetrating fire blocking or framing, and terminated with the correct fittings.
In homes where attic access is limited — cathedral ceilings, vaulted areas, certain room configurations — the routing becomes more creative and the work takes longer. I’ll tell you what the access situation looks like during the assessment, not after you’ve agreed to the job.
At each fixture location — every sink, toilet, shower valve, tub, dishwasher, washing machine, and refrigerator ice maker — the new supply lines terminate in pre-fabricated copper stub-outs. A copper stub-out is a short section of rigid copper pipe that’s secured to wood blocking fastened to the stud behind the wall. That blocking is the key detail. It gives the stub-out a solid, immovable anchor. No flex. No movement when the valve is operated. No slow stress on the connection over years of use. The stub-out itself sweat-solders to a copper fitting on one end and connects to the PEX supply line on the other. It’s a rigid, professional termination at every single fixture — not a PEX line flopping around behind a cabinet waiting for someone to bump it.
The galvanized or polybutylene lines that get abandoned in place are not a problem. They’re no longer carrying water pressure once the new lines are active. They stay in the wall and do nothing.
Step 6: Pressure Test
Before any drywall closes and before the rough-in inspection, the entire new system is pressure tested at 100 psi for a minimum of 15 minutes. Every connection, every stub-out, every transition point has to hold that pressure without dropping. If anything doesn’t hold, it gets corrected before the walls close. I pressure test every job. This is not optional and it’s not something I’m going to shortcut under time pressure.
Step 7: Rough-In Inspection
After the pressure test, the inspector from the City of Venice or Sarasota County (depending on the property’s jurisdiction) comes to verify the installation before walls close. This is the step that creates your documentation trail — the inspection record is the proof that the work was done correctly to code by a licensed contractor.
Step 8: Drywall Patching
After the rough-in inspection passes, the access cuts are patched. On a standard overhead repipe, the access openings are small — typically at each fixture stub-out location and at any point where the pipe needs to transition from attic to wall. A professional drywall repair contractor handles the patching and texturing to match the existing wall surface.
Drywall patching is sometimes quoted separately by plumbers who want to show a lower base price and then add it back. My quotes include it as part of the total job scope. There’s no reason for a homeowner to separately contract drywall repair after a repipe — it should be part of what you’re given a total price for.
Step 9: Final Inspection and Walkthrough
After drywall is complete and every fixture is reconnected and tested, the final inspection closes the permit. I walk through every fixture with the homeowner — every faucet, every toilet, every shower valve — and confirm full function and correct water pressure before I consider the job done.
Plumbing Detectives LLC Professional Opinion
A repipe quote that doesn’t include the permit, the pressure test, and the drywall patching in a single total is not a complete quote. It’s a number designed to look competitive that will grow once the job is underway. Ask every contractor you’re comparing to give you one number that covers all of it — materials, labor, permit, inspection, and patch. Then compare those numbers. That’s a fair comparison. A permit-included, patch-included quote from a licensed contractor is not the same thing as a lower number that doesn’t include those items.
The Questions I Hear Most Often
Addressing Homeowner Concerns — The Questions I Hear Most Often
“How much will this cost?”
A whole-home repipe in Venice for a typical 1,500 to 2,500 square foot single-family slab home runs approximately $5,000 to $11,000 for PEX-A, or $7,000 to $14,000 for copper, based on the most detailed publicly available Southwest Florida cost data from contractors serving this market. These are typical market ranges — not a guaranteed quote for your home. The range is wide because fixture count, home size, attic access conditions, and pipe routing complexity all affect the final number meaningfully. Every job gets a written flat-price assessment before work begins.
For context, a sample breakdown for the most common repipe job in the Southwest Florida market — a 3-bedroom, 2-bath home from the 1980s or 1990s in the 1,600 to 2,000 square foot range — looks like this: PEX-A materials and fittings around $900 to $1,500; shut-off valve replacements $200 to $400; labor for a two-day crew $3,200 to $5,000; permit and inspections $200 to $400; drywall patching $300 to $700. Total in that range: roughly $4,800 to $8,000.
I provide a written flat-price quote after the assessment. That number doesn’t change after the job starts unless something genuinely unexpected is discovered — and if that happens, I call before proceeding.
“How long will I be without water?”
For most Venice homes, one day. We typically schedule the repipe as a two-day job — day one for running the new lines, day two for connecting fixtures and completing stub-outs. Water is off during working hours and restored by end of day one for overnight use. By end of day two the system is fully operational and ready for the pressure test and inspection.
“Will this damage my floors or walls significantly?”
The overhead repipe method minimizes interior disruption. The access cuts are small — typically at fixture stub-out locations and transition points. They are not major demolition. A professional drywall repair makes them invisible after patching. The goal is to leave the home in better shape than we found it, not to tear it apart to run new pipe.
“Do I need to move out?”
For most standard residential repiping jobs — especially single-story slab homes under 2,500 square feet — no. Water is restored overnight. Dust and disruption are localized to the work areas. If you have pets, keeping them in a separate room or boarding them for the two-day job is practical but not mandatory. For larger or more complex homes, or for homeowners who are sensitive to the disruption of having a crew working through the house, I’ll tell you upfront what the job actually looks like day by day.
“What about the insurance situation?”
This is the question I think deserves the most honest answer. For polybutylene specifically, the insurance situation is serious. Citizens Property Insurance Corporation — the state-run insurer of last resort — has a written rule declining new coverage for homes over 20 years old with active polybutylene. Most private carriers in Florida treat a four-point inspection that identifies polybutylene as grounds for automatic decline. A home that cannot obtain standard homeowners insurance cannot be financed through conventional mortgage lenders. This affects both coverage availability and resale.
After a completed repipe, the documentation trail is what your insurance agent needs: the permit, the final inspection sign-off, the contractor’s invoice, and photographs of the new pipe material. Some contractors issue a “certificate of repipe” as a single summary document. We provide the permit and inspection documentation plus a written completion statement that satisfies what carriers typically ask for.
For galvanized pipe, the insurance situation is less uniformly documented than polybutylene but is increasingly flagged. Florida insurance advisors describe galvanized as a “high-risk” material that leads carriers to increase premiums, add deductibles, or decline coverage for older homes with original supply lines. If you’ve received a non-renewal notice or a rate increase that was attributed to your plumbing on a four-point inspection, that’s a sign the insurance market is starting to respond to your home’s pipe material.
“Will a repipe actually increase my home’s value?”
Honestly, a repipe is more about insurability and marketability than it is about a direct appraisal value increase. The mechanism is indirect: a home with active polybutylene or severely corroded galvanized that cannot obtain standard homeowners insurance becomes difficult to sell conventionally. A home with a documented, permitted repipe removes that obstacle. In a Venice market where many buyers are retirees and seasonal homeowners who are getting four-point inspections done as a matter of course, the insurability question comes up at sale. A repipe addresses it definitively.
What I Find in the Field
Common Repipe Mistakes I Find
When I’m called to evaluate a repipe that someone else did — whether to assess quality, troubleshoot a problem, or price corrective work — these are the mistakes I find most consistently in the Venice market.
Inadequate pipe support spacing. PEX supply lines require support at specified intervals — every 32 inches for horizontal runs, per Florida Building Code, and at every directional change. I find repipes where support brackets are spaced too far apart, leaving long unsupported runs that sag, vibrate, and create water hammer noise. Proper support is not visible once the walls close — it’s something a lazy crew skips knowing nobody will check.
Cheap shut-off valves at fixture locations. Every fixture stub-out should terminate with a quality quarter-turn angle stop. Angle stops are what connect the supply stub-out to your sink, toilet, and dishwasher supply lines — the small valve under every fixture. Quarter-turn angle stops are the current standard — they open and close completely with a single 90-degree turn and hold pressure reliably for decades. I find compression-fit angle stops chosen for cost rather than performance. In a Venice home on hard water, cheap angle stops seize within five to seven years. A quality angle stop outlasts the pipe.
Incorrect transitions between pipe types. Where new PEX connects to existing copper at a manifold or at a fixture that’s being retained, the transition fitting must be the right fitting for both materials. I find improvised transitions — wrong fitting types, wrong size adapters, mismatched threads — that hold water initially but create leak points or restriction zones that cause problems later.
Buried fittings. Every fitting — every connection point — in a repipe must be accessible or must be in a location where it can be accessed without major demolition. I find fittings buried in concrete patches, in inaccessible slab sections, or behind sealed wall sections with no access panel. This is a code violation and a maintenance nightmare.
Undersized pipe. The repipe runs must be sized correctly for the fixture count and the flow rates the home requires. A 3/4 inch main with 1/2 inch branch lines to every fixture is appropriate for most Venice single-family homes. I find repiping work done with undersized branch lines that create pressure imbalance — the shower pressure drops when a toilet is flushed, or the hot water flow at a remote bathroom is noticeably weaker than at the fixtures closest to the heater.
Missing hammer arrestors. Water hammer — the knocking or banging sound when a washing machine valve closes fast or a dishwasher solenoid shuts off — is caused by pressure wave propagation in the supply line. Hammer arrestors at high-velocity valve locations (washing machine, dishwasher) absorb those pressure waves. I find repiped homes where hammer arrestors were never installed and the homeowner has been living with banging pipes since the repipe was done.
Stub-outs not blocked or secured to framing. Every fixture stub-out — the connection point where the supply line meets the valve under a sink, behind a toilet, inside a shower wall — needs to be anchored to solid wood blocking secured to the stud behind the wall. Without that blocking, the stub-out is held in place only by the PEX line running behind it. Every time someone operates the valve, every time there’s water hammer, every time someone bumps the cabinet under the sink, that unsecured stub-out moves slightly. Over time those micro-movements stress the connection. I find repiped homes where the stub-outs were terminated without any blocking — just a PEX line with a fitting floating in a wall cavity. It looks fine until it doesn’t.
No pressure test. The most serious omission. A repipe that wasn’t pressure tested before the walls closed is a repipe with unknown integrity. If a connection failed during the test it would have been caught and corrected. Without the test, the first indication of a failed connection is water in the wall or ceiling. I won’t close a wall without a pressure test. Full stop.
Plumbing Detectives LLC Tips
If your Venice home was built between 1978 and 1995 and you don’t know what pipe material is behind your walls, have someone check before your next insurance renewal. A four-point inspection that flags polybutylene is a surprise you don’t want at renewal time. A plumber can identify the material from accessible points in about 15 minutes.
If you have galvanized supply lines and your water pressure has been declining gradually, run this test: note the static pressure on an outdoor hose bib with a gauge while no other fixtures are running. If it reads normal city pressure (typically 60 to 80 psi in Venice), the problem is inside your pipe — the galvanized is narrowing. If the street-side pressure is also low, the problem is the utility or the PRV, not your pipes.
Three pinhole leaks in copper within six months is the threshold where I stop recommending spot repairs and start having the repipe conversation. Below that threshold I’ll tell you honestly what I see and whether repair makes more sense than replacement.
For homes in The Plantation Golf & Country Club, Gran Paradiso, Venetian Golf & River Club, and other gated Venice communities — any exterior-visible component of a repipe project, including exterior water softener installation, exterior hose bib relocation, or visible exterior pipe routing, likely requires prior ARC or ACC approval. Interior repipe work generally doesn’t. Confirm with your HOA administrator before scheduling work that has any exterior component.
Local Knowledge
Venice Neighborhoods and What I Typically Find
Venice Gardens. The most uniformly documented repipe market in Sarasota County — Sarasota County’s own neighborhood plan confirms an average build year of 1969 for the entire 34-plat subdivision, developed by a single developer in one continuous construction window from 1956 to 1972. Every original home in Venice Gardens is in the galvanized supply line era. 87 percent of homes are owner-occupied, many by long-tenure residents who’ve been in the same house for decades without the supply lines being touched. When I get a call from a Venice Gardens address — zip code 34293 — about declining pressure or discolored water, galvanized supply lines are the first thing I look for.
South Venice. The largest subdivision in Sarasota County and one of the more complex repipe markets locally. South Venice has homes ranging from the 1950s to the 1980s, a mix of septic and sewer service, no deed restrictions, and a housing stock that includes everything from original bungalows to later additions and partial remodels. I’ve opened walls in South Venice expecting galvanized and found copper. I’ve gone in expecting copper and found a mix. The septic situation matters for water softener backwash discharge — if the home is on septic, the softener needs to be sized appropriately for the system’s loading capacity.
Gulf View Estates, Pinebrook South, Jacaranda West. Primarily 1970s and 1980s construction. These neighborhoods fall in the overlap window — some homes have copper, some have polybutylene, some have CPVC from various renovation eras. The 1978 to 1995 window for polybutylene is fully represented here. I check accessible pipe sections carefully in any of these neighborhoods before drawing a conclusion about what’s in the walls.
Venice Island and the historic core. The oldest housing in the Venice market — zip code 34285 — some homes dating from the 1920s and 1930s. If these homes still have original supply lines, those lines predate even the galvanized era in some cases and would represent a genuinely extreme case of aged infrastructure. Most Island homes have been renovated at some point, but the extent of that renovation varies widely.
Pelican Pointe, Waterford, Plantation Golf & Country Club, Stoneybrook. 1990s and early 2000s gated community construction. These homes are primarily copper from that era — now 25 to 35 years old and entering the age range where pinhole leak patterns become realistic. HOA access logistics apply for service scheduling.
Wellen Park, Islandwalk, Gran Paradiso, newer communities. Post-2010 construction with PEX supply lines and no galvanized or polybutylene exposure. Repipe is not a realistic near-term service category for these homes. If I’m called to a newer Wellen Park home about pressure or water quality, I’m looking at installation quality and water chemistry rather than pipe age.
Insurance & Resale
The Insurance and Resale Reality for Venice Homeowners
The insurance dimension of repiping is something I want Venice homeowners to understand clearly, because it’s often the factor that moves a “maybe” to a “yes” without any actual pipe failure having occurred.
Florida’s four-point inspection — required for most homes built before 2000 when obtaining new coverage or renewing with many carriers — documents the pipe material for both supply and drain lines. The Citizens Property Insurance Corporation four-point form explicitly lists Copper, PVC, Galvanized, and Polybutylene as the pipe type checkboxes. When an inspector checks “Polybutylene” on that form, most carriers — including Citizens under Rule 206.B for homes over 20 years old — decline to write coverage.
The practical consequence for a Venice homeowner with polybutylene is this: when your current carrier comes up for renewal and orders a four-point inspection, or when you go to sell the home and the buyer’s carrier orders one, the pipe material becomes a transaction issue. A home that cannot obtain standard homeowners insurance cannot be financed through conventional mortgage lenders. That’s not a distant theoretical concern. It’s a documented reality in the Florida insurance market.
For galvanized pipe, the insurance situation is less uniformly codified than polybutylene but increasingly relevant. Florida insurance advisors describe galvanized as a high-risk material that leads carriers to apply additional deductibles, restrict coverage, or decline new business on older homes with original galvanized supply lines.
After a completed repipe, the documentation I provide — the permit, the final inspection sign-off, the invoice, and photographs of the new pipe material — is the package your insurance agent needs. I’d recommend verifying with your specific carrier what documentation they require before the repipe job is scheduled, so you have exactly what they need ready to submit.
Before You Call
How to Identify Your Pipe Material — Before You Call
You don’t have to wait for a plumber to have a basic idea of what’s in your home. Here’s how to self-screen in about ten minutes.
Check under sinks. Look at the supply lines connecting the shut-off valves under your kitchen and bathroom sinks to the faucet connections. These are usually short, flexible braided lines and won’t be the original pipe, but where they connect to the shut-off valve you can often see the supply pipe material coming out of the wall.
Check the water heater connections. The pipes connecting to the top of your water heater are often the most accessible supply line sections in the home. Look at the material, the color, and any markings on the pipe.
Check under the house if there’s a crawl space or attic access. If your home has accessible attic space, a plumber can often see where supply lines run. Flexible gray pipe is likely polybutylene. Rigid copper-colored pipe is copper. Cream or gray rigid pipe is likely CPVC. Flexible red or blue pipe is PEX.
Look for the stamp. Polybutylene is marked “PB2110” printed along the side of the pipe. It may be faded and require a flashlight to read. This stamp is the definitive identification — a gray flexible pipe with PB2110 is polybutylene. A gray flexible pipe without that stamp may be PEX, which is a modern material with no problems.
Critical note: you cannot assess polybutylene’s internal condition from the outside. The pipe degrades from the inside and looks normal externally right up until it fails. External appearance is not a reliable indicator of remaining service life for polybutylene.
How I Work
Diagnosis First — The Only Way I Work
I want to be plain about how I approach every repipe conversation. There is real money in repiping — it’s one of the larger residential plumbing jobs, and there are plumbers in this market who lead with replacement before they’ve fully understood the situation. I don’t operate that way.
When I’m called to evaluate a potential repipe, I want to understand what the pipes are actually doing. A pressure test tells me whether the system is holding. A visual inspection of accessible sections tells me what the material condition looks like. A review of the repair history tells me whether isolated failures or a systemic pattern are what I’m dealing with.
Sometimes the right answer is a spot repair, not a repipe. I’ve been called to Venice homes where the homeowner was expecting a repipe quote and I told them a targeted repair was the correct answer. That conversation doesn’t make me money on that visit. It builds the kind of relationship where the homeowner calls me when the time for a repipe actually arrives — and trusts the recommendation when I make it.
Ready for an honest repipe assessment? I’ll look at the full system, pressure test if warranted, and give you a straight answer about what your home needs. No pressure. Call 239-388-3631 or request an assessment online.
Call Now239-388-3631The Standard
Why Plumbing Detectives LLC
I named the company Plumbing Detectives LLC because too many homeowners get sold expensive work before anyone takes the time to understand what’s actually wrong. A repipe is the largest plumbing decision most homeowners make. It deserves a contractor who will assess the situation honestly, explain what they find, and recommend what’s actually right for the home — not what generates the largest invoice.
I live in Venice Gardens. I work in this market every day. When I recommend a repipe, it’s because the evidence supports it. When I recommend a repair instead, that’s what I actually think is the right answer. That philosophy is the reason I named the company what I named it, and it’s the standard every job is held to.
License CFC1434139. Fully insured. We pull permits in both City of Venice and Sarasota County jurisdictions.
Permitted & Inspected
Professional Work Done Right
Every repipe we perform is permitted and inspected. City of Venice properties permit through the City of Venice Building Department at 401 W. Venice Ave — base plumbing permit fee $90 plus project valuation. Sarasota County properties permit through Sarasota County Planning and Development Services. We verify jurisdiction for every job, pull the correct permit, and schedule and coordinate all required inspections. Work is performed to the 2023 Florida Building Code, Plumbing, 8th Edition.
Documented Work
Repipe Work, Photographed on the Job
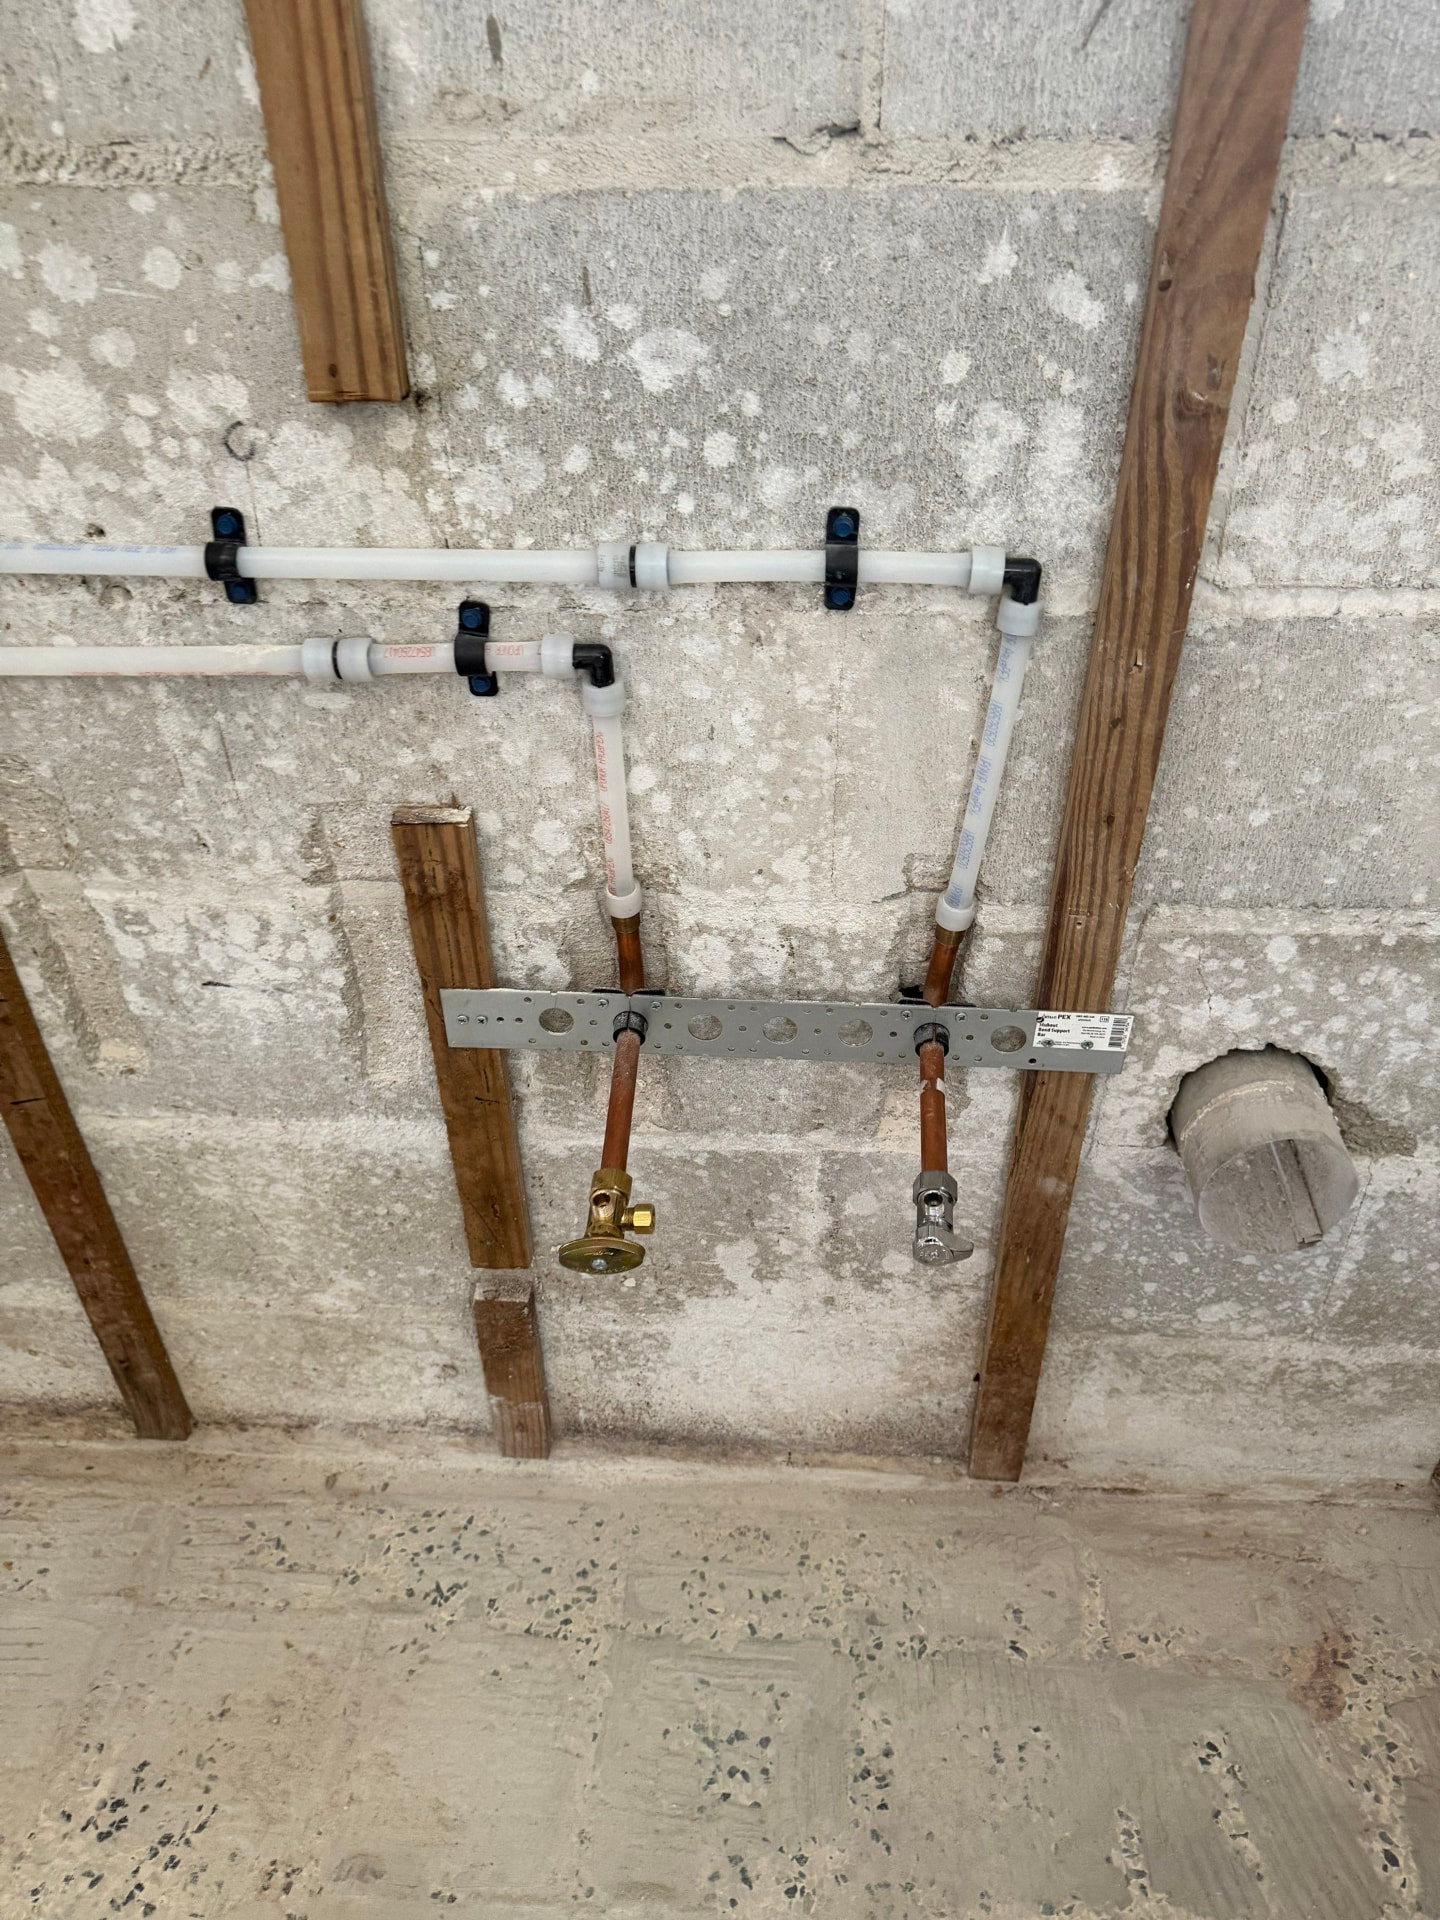
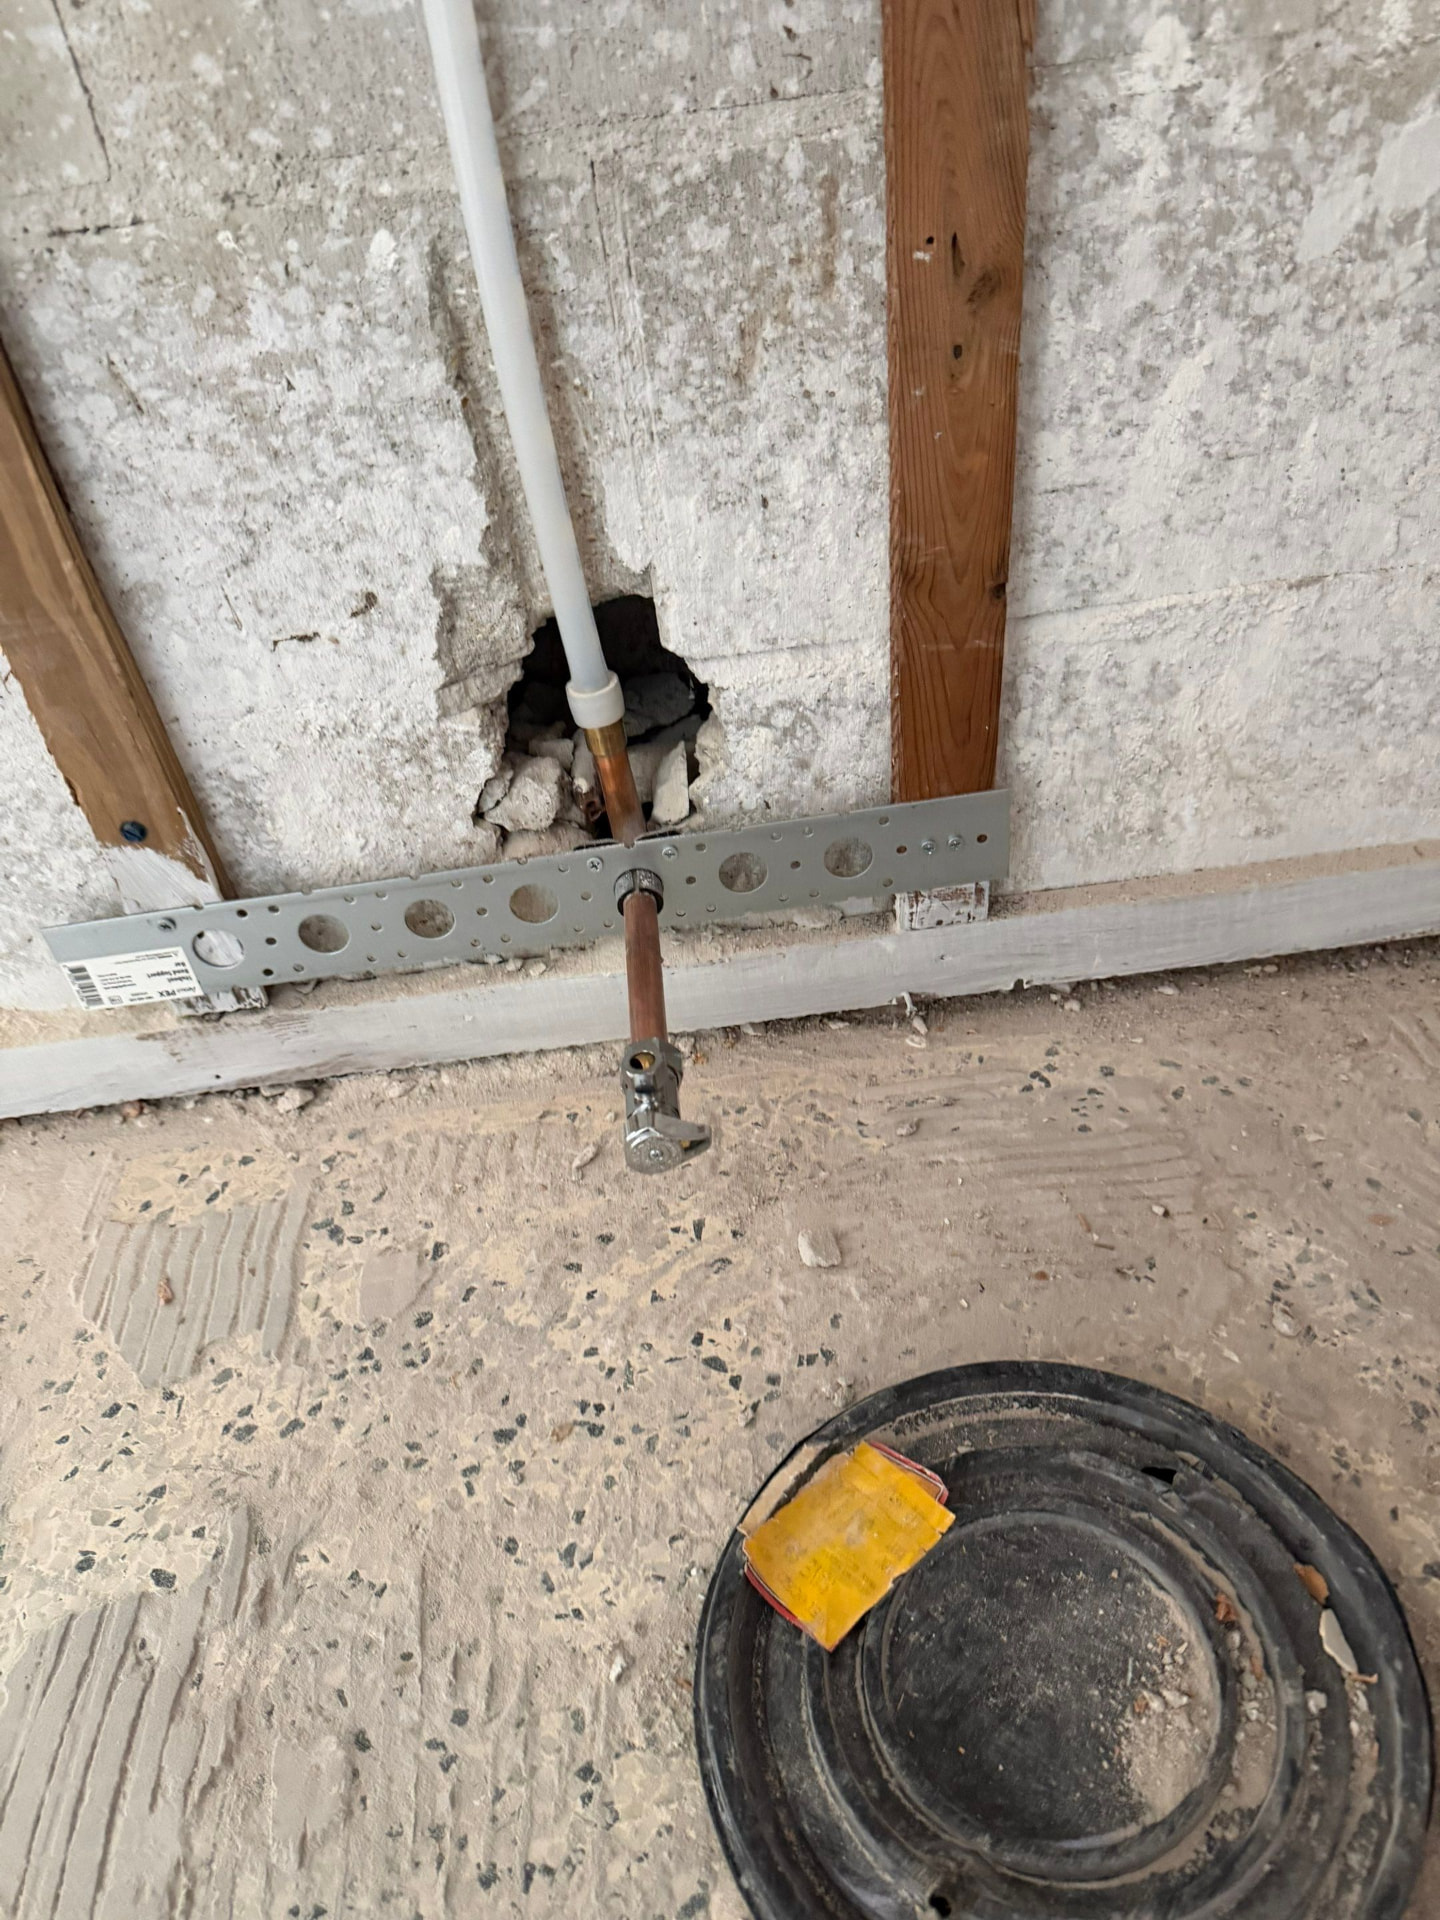
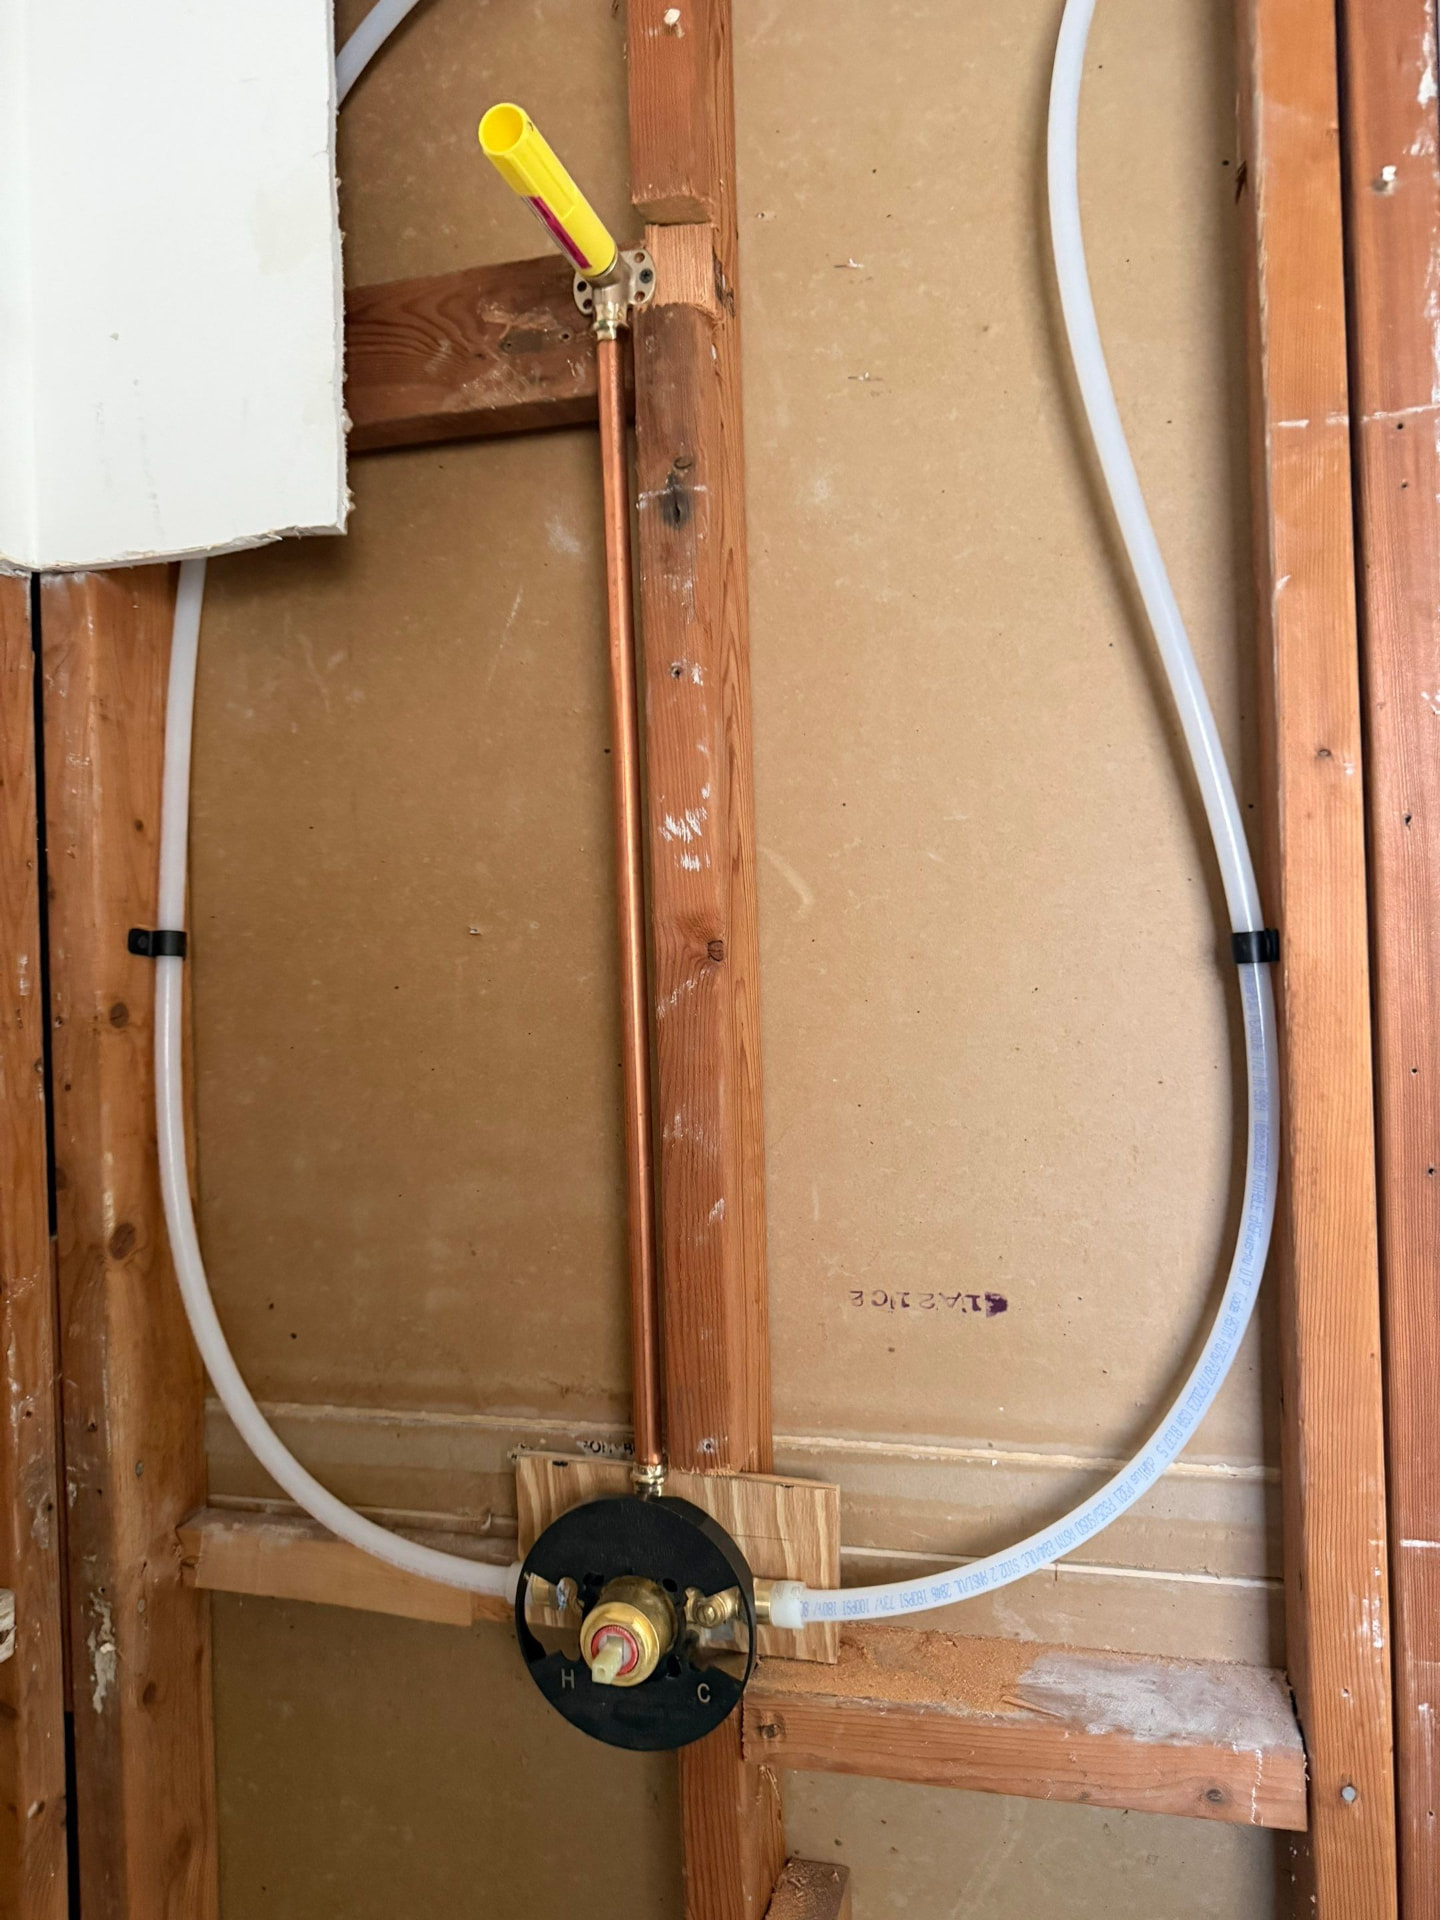
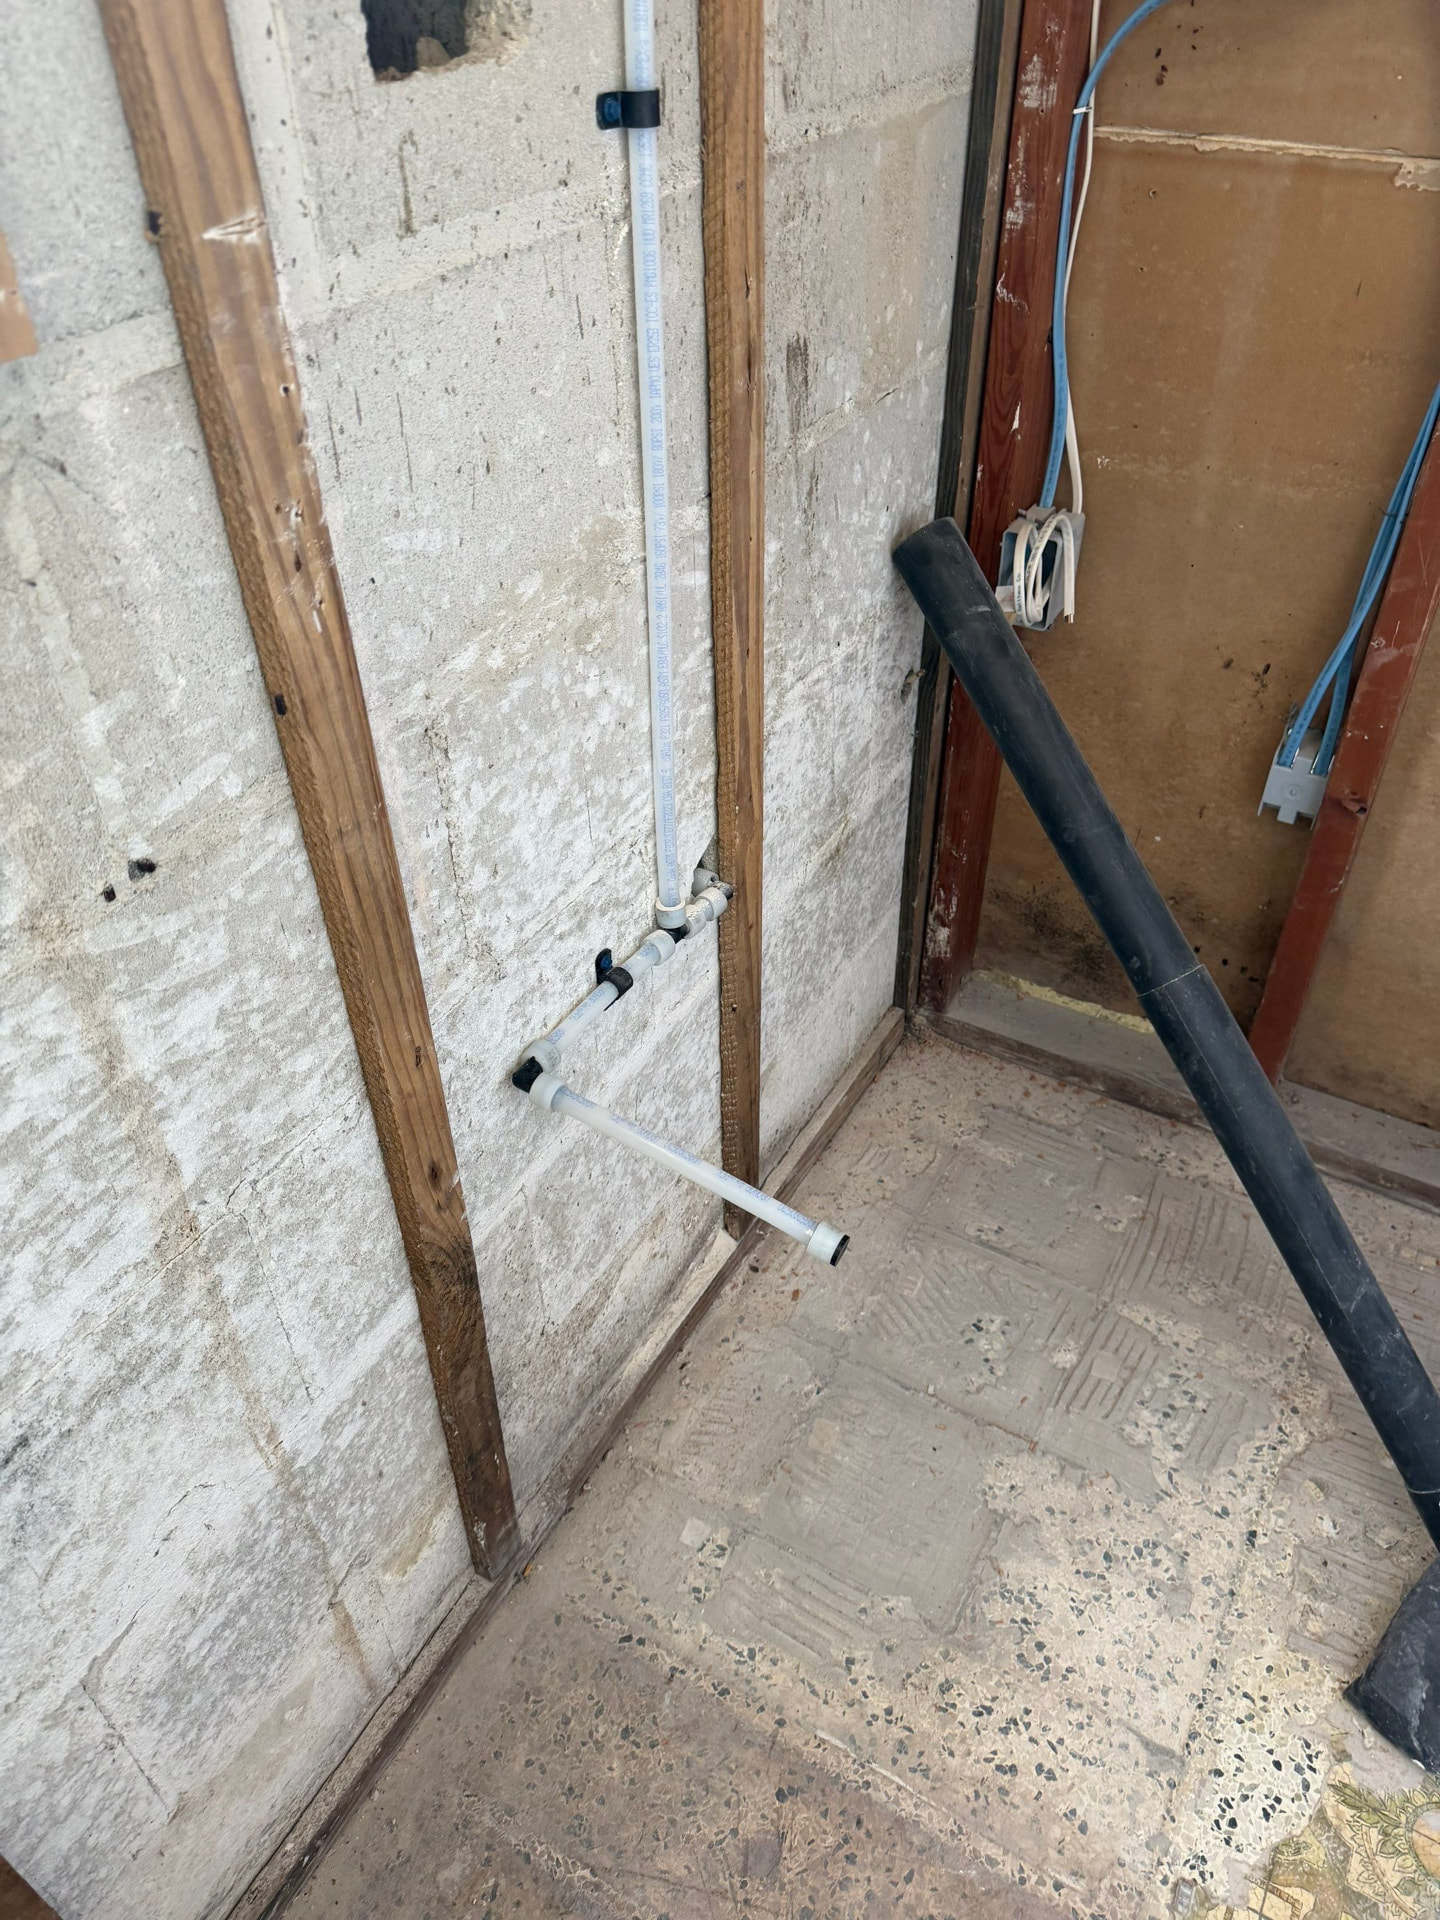
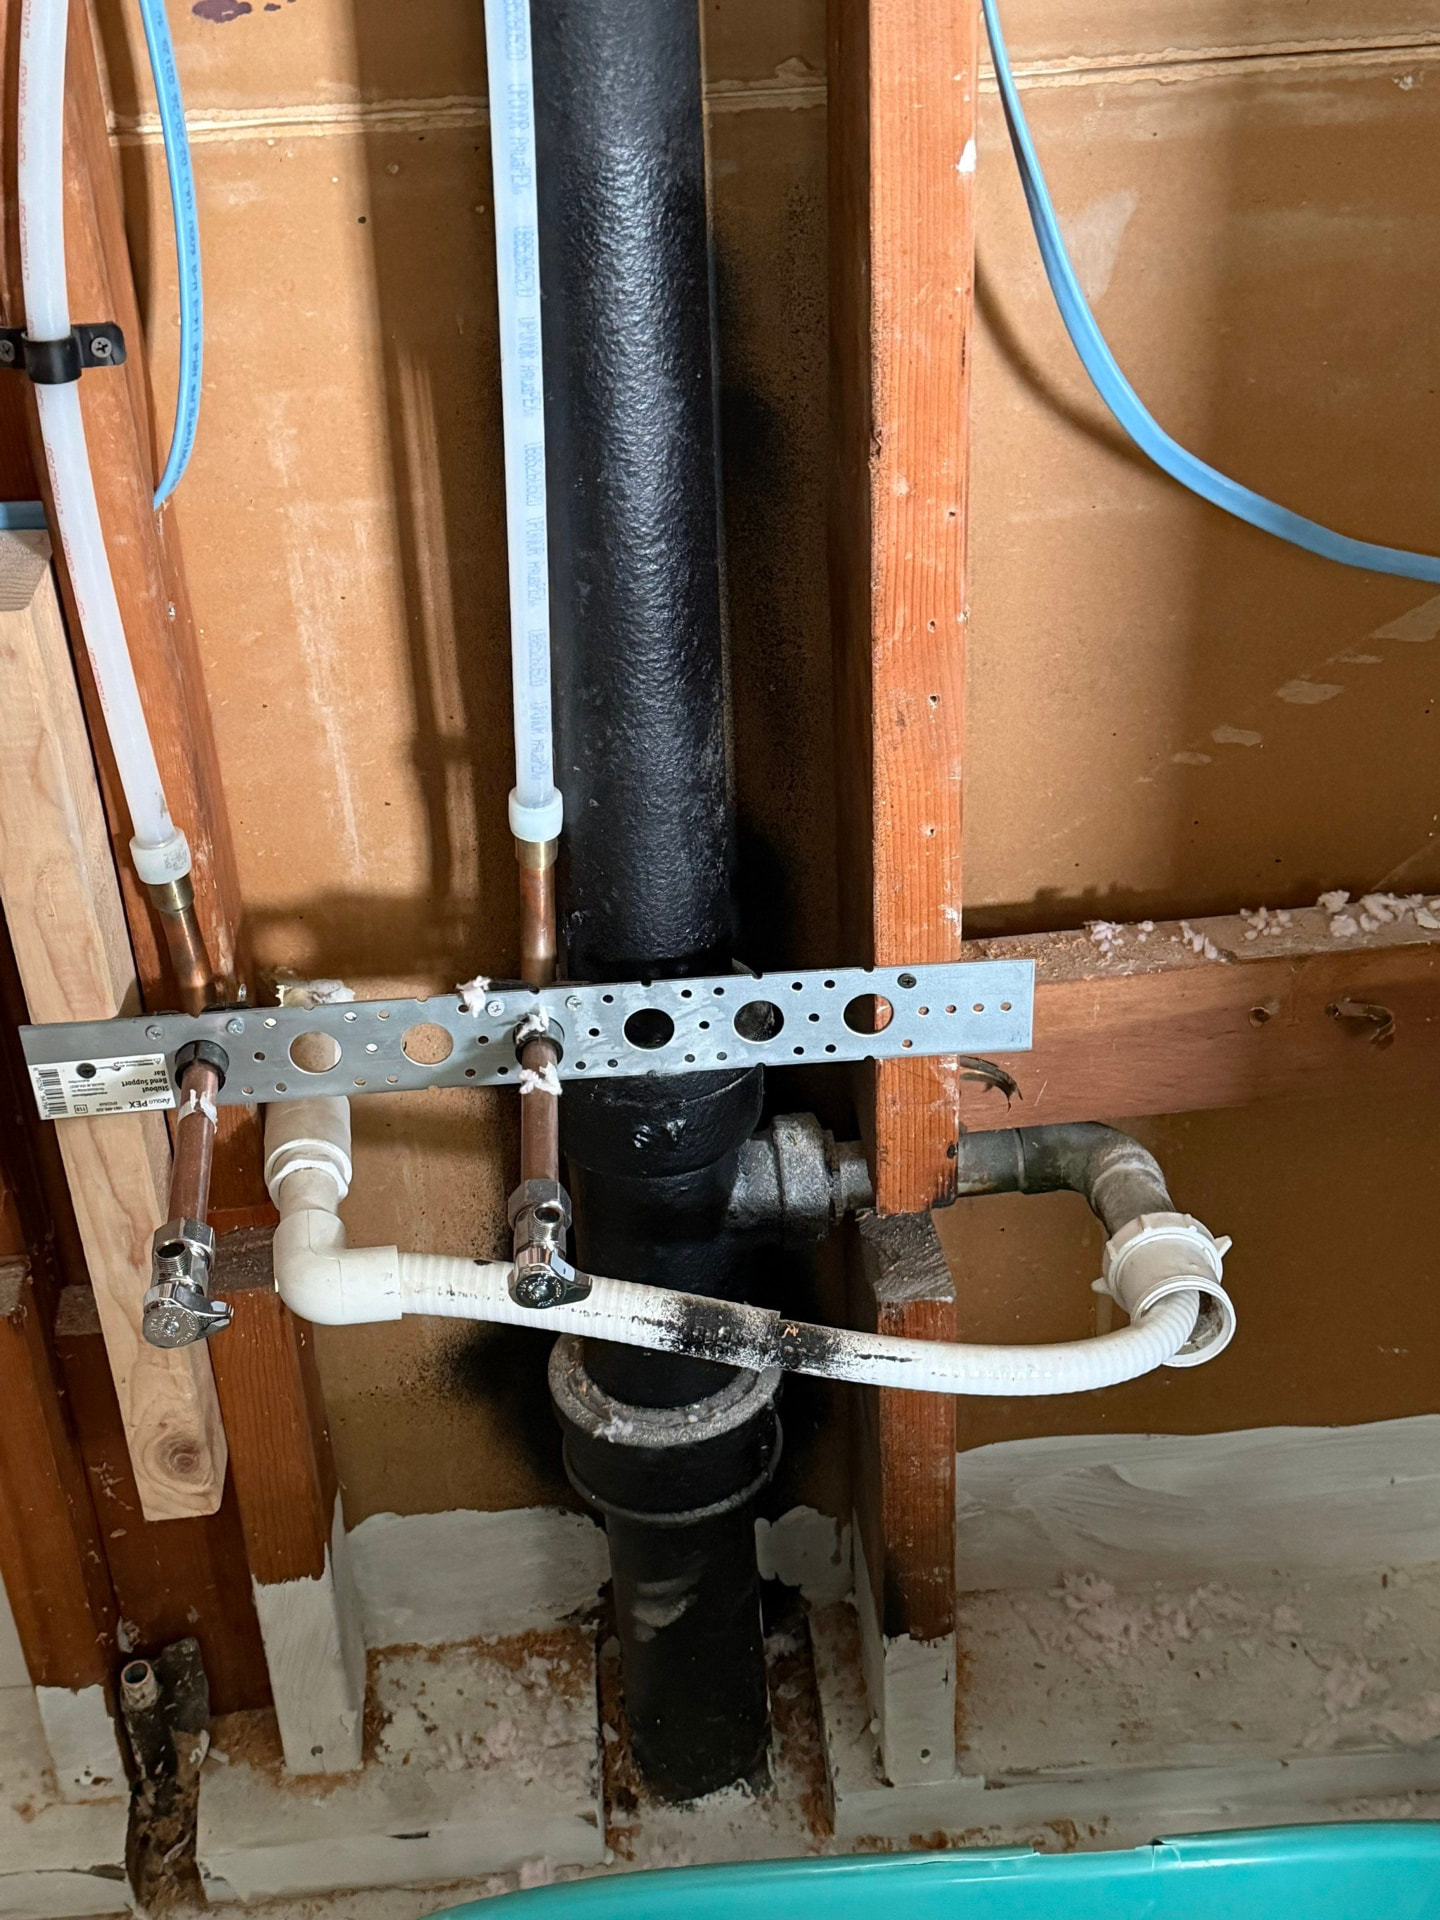
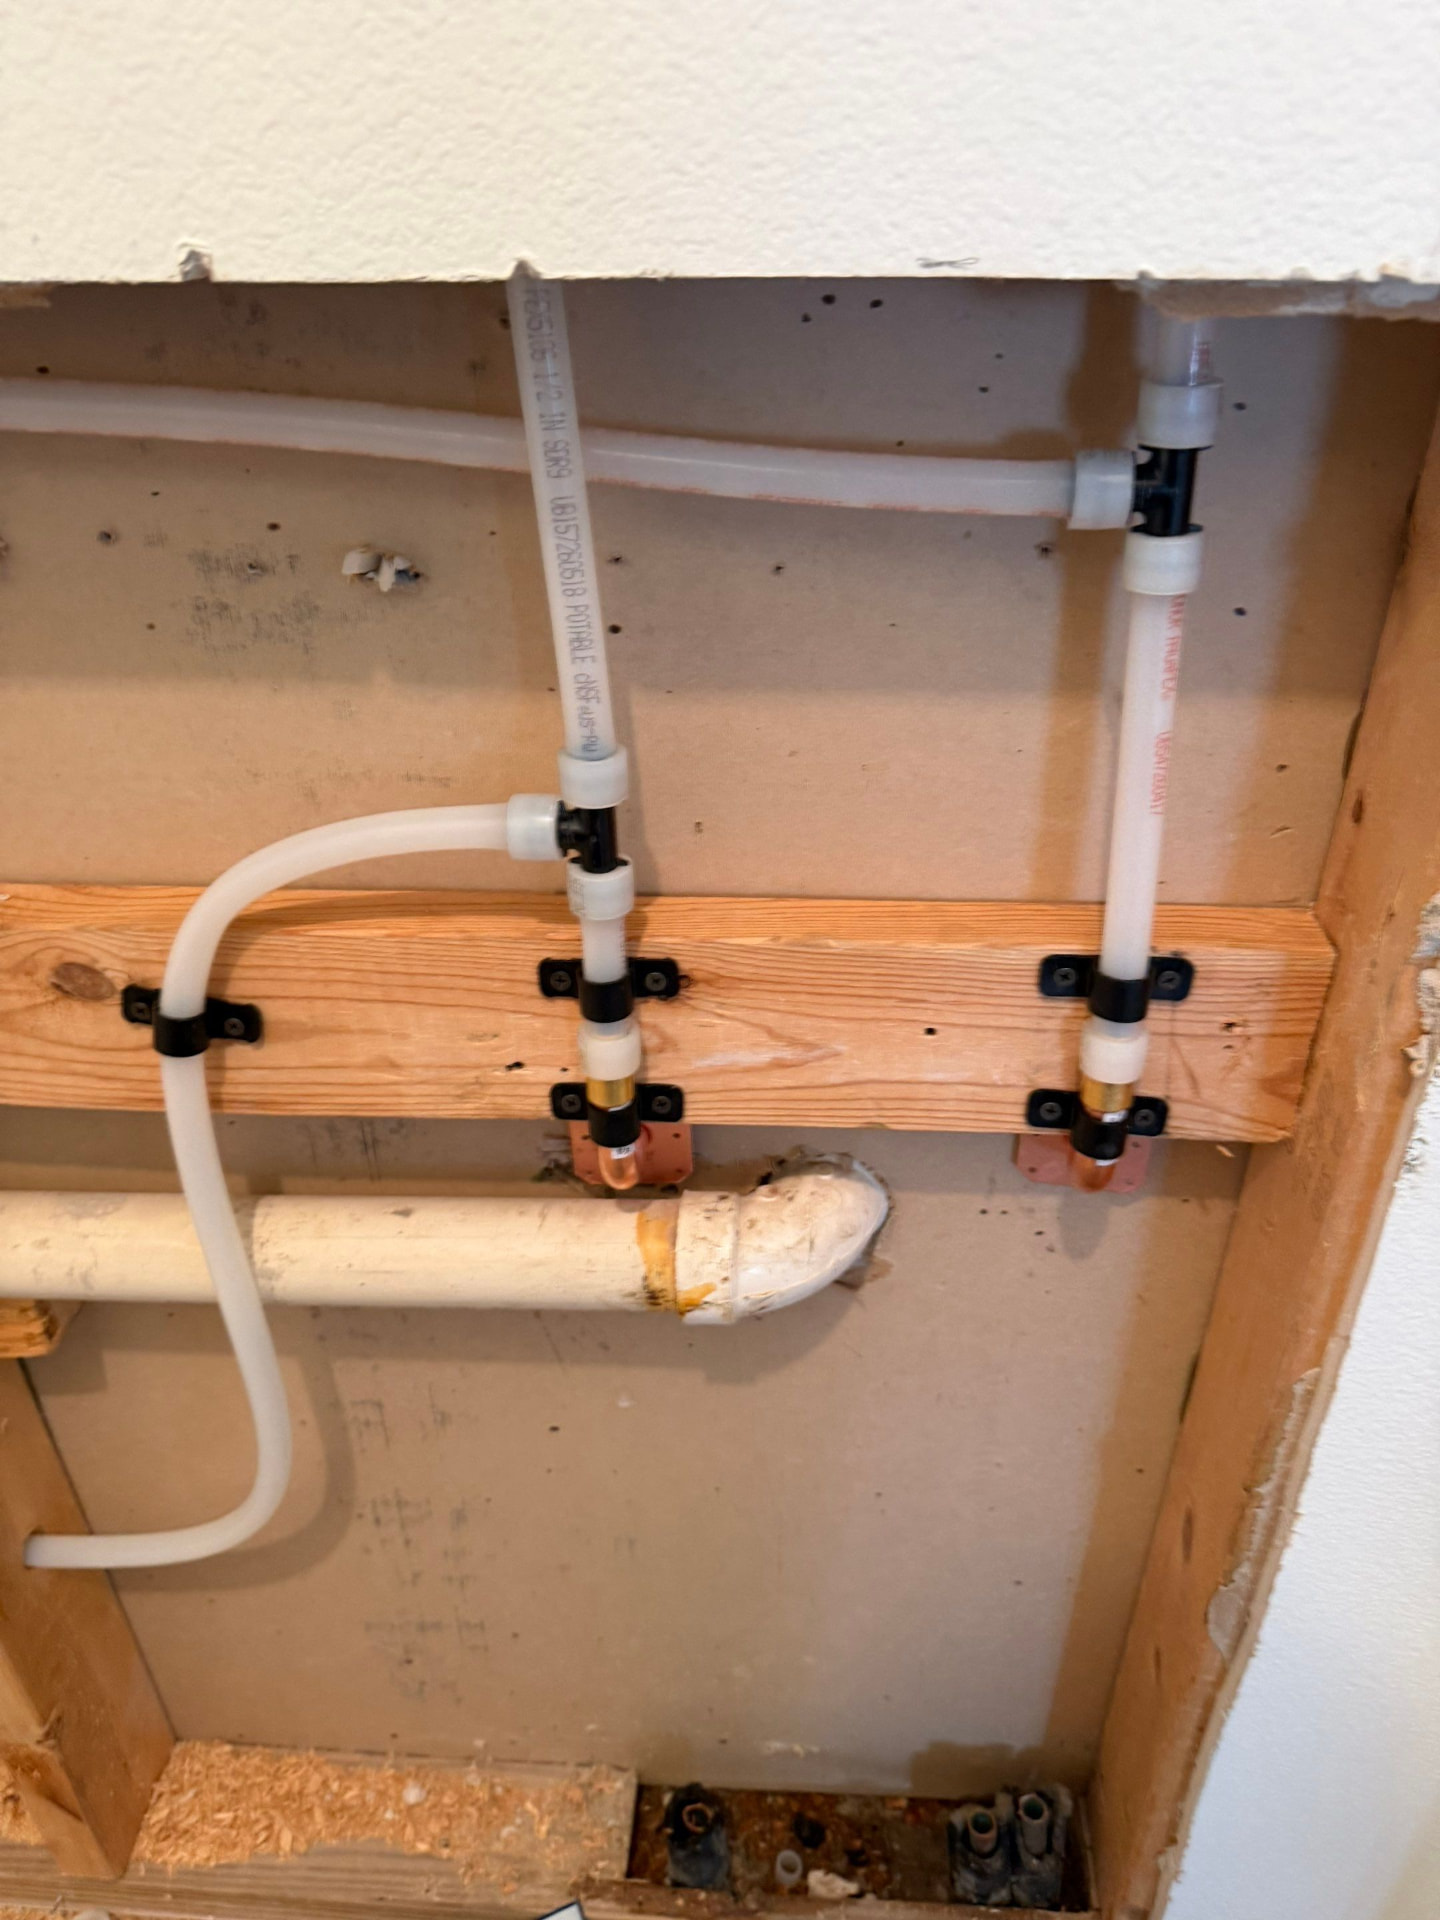
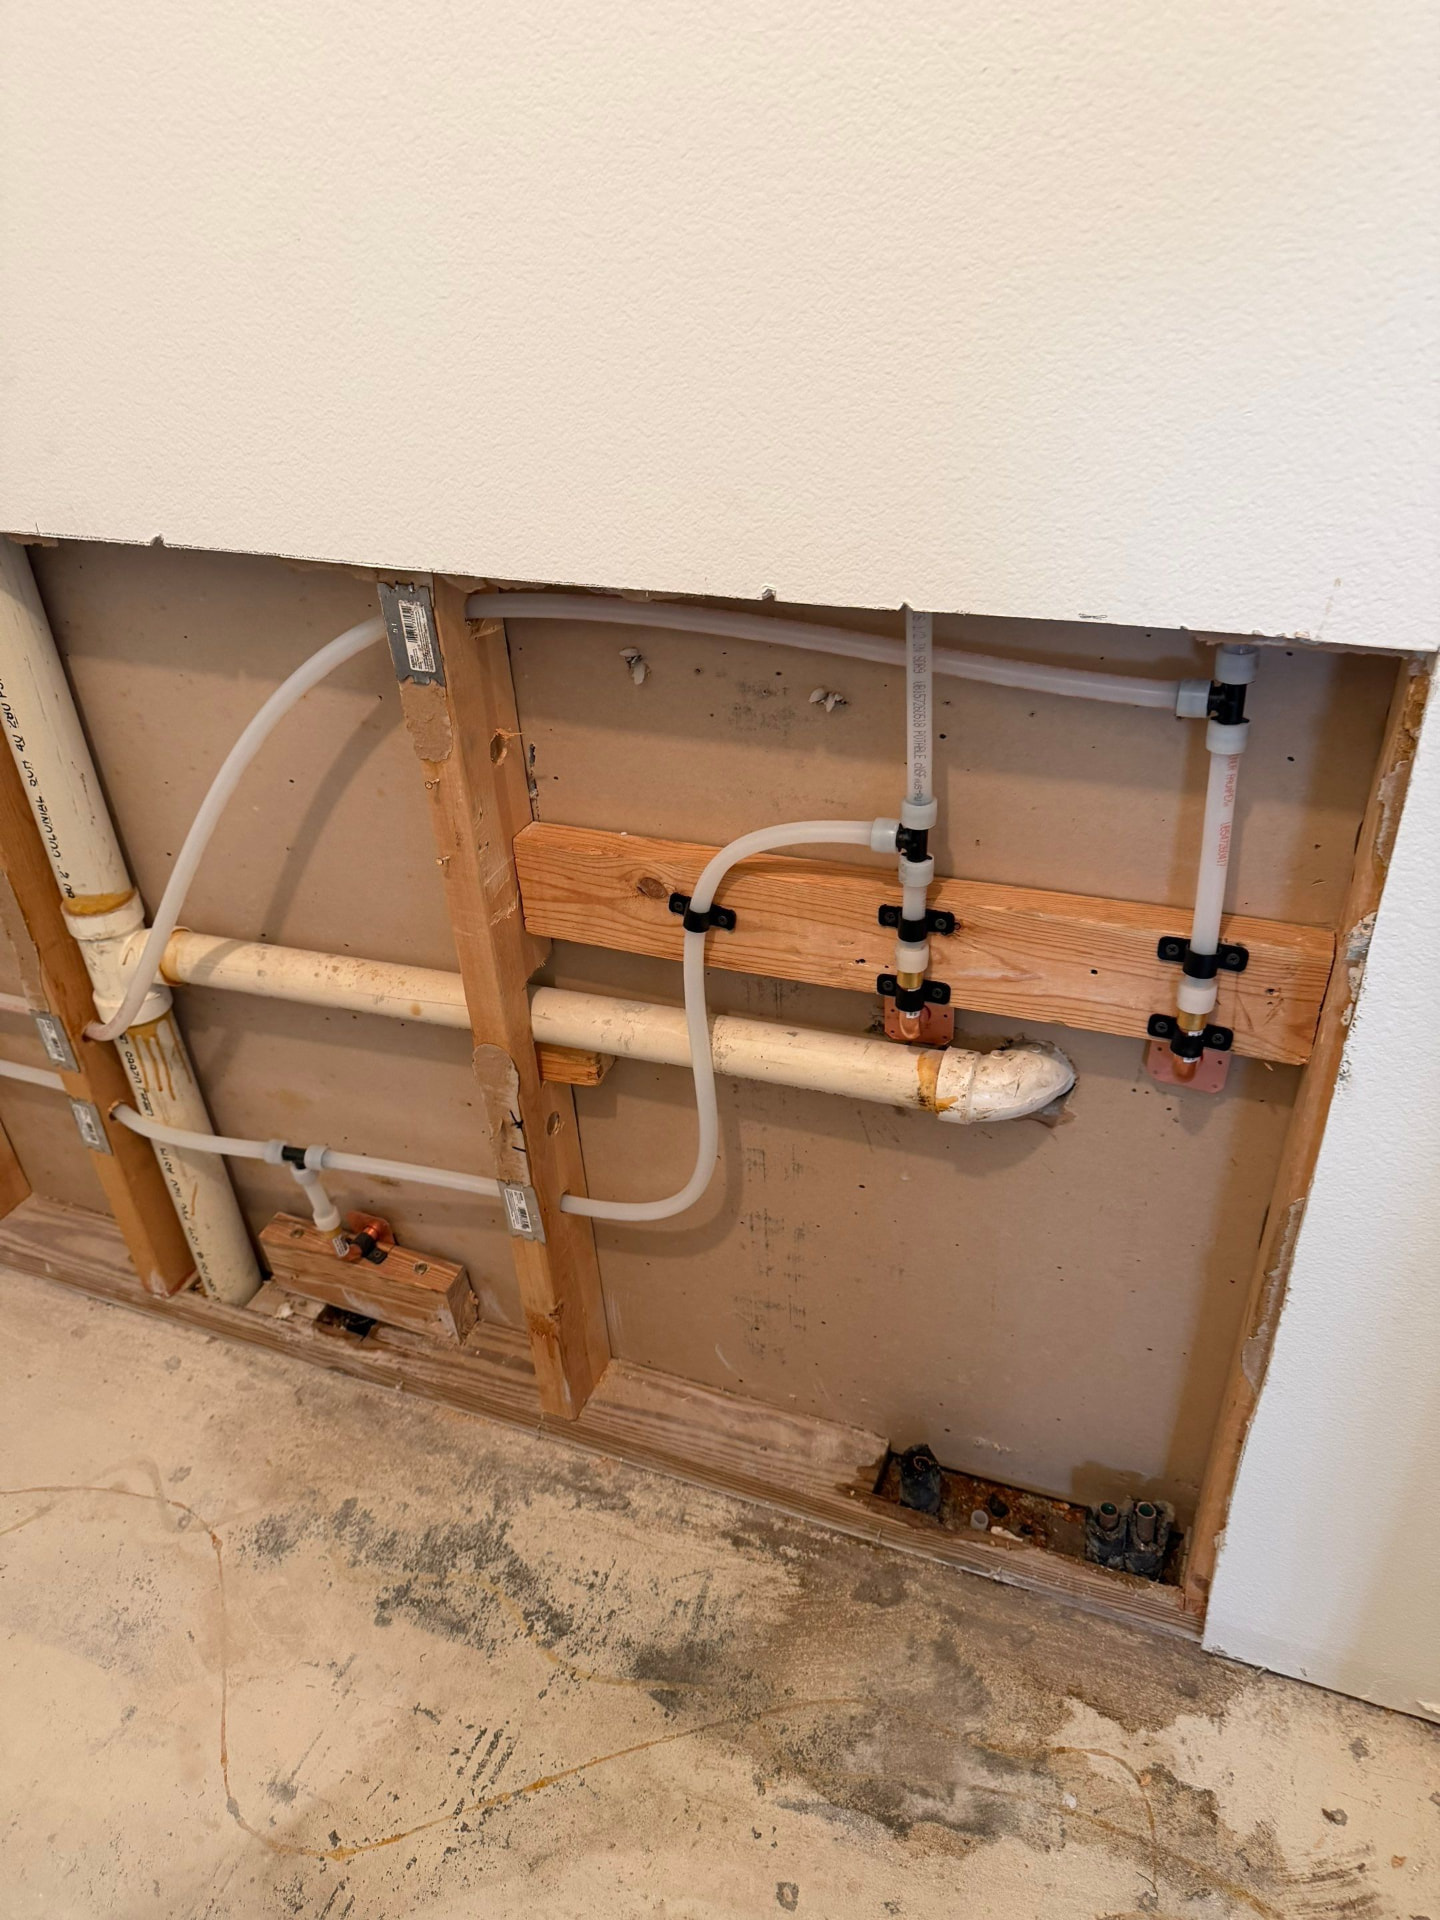
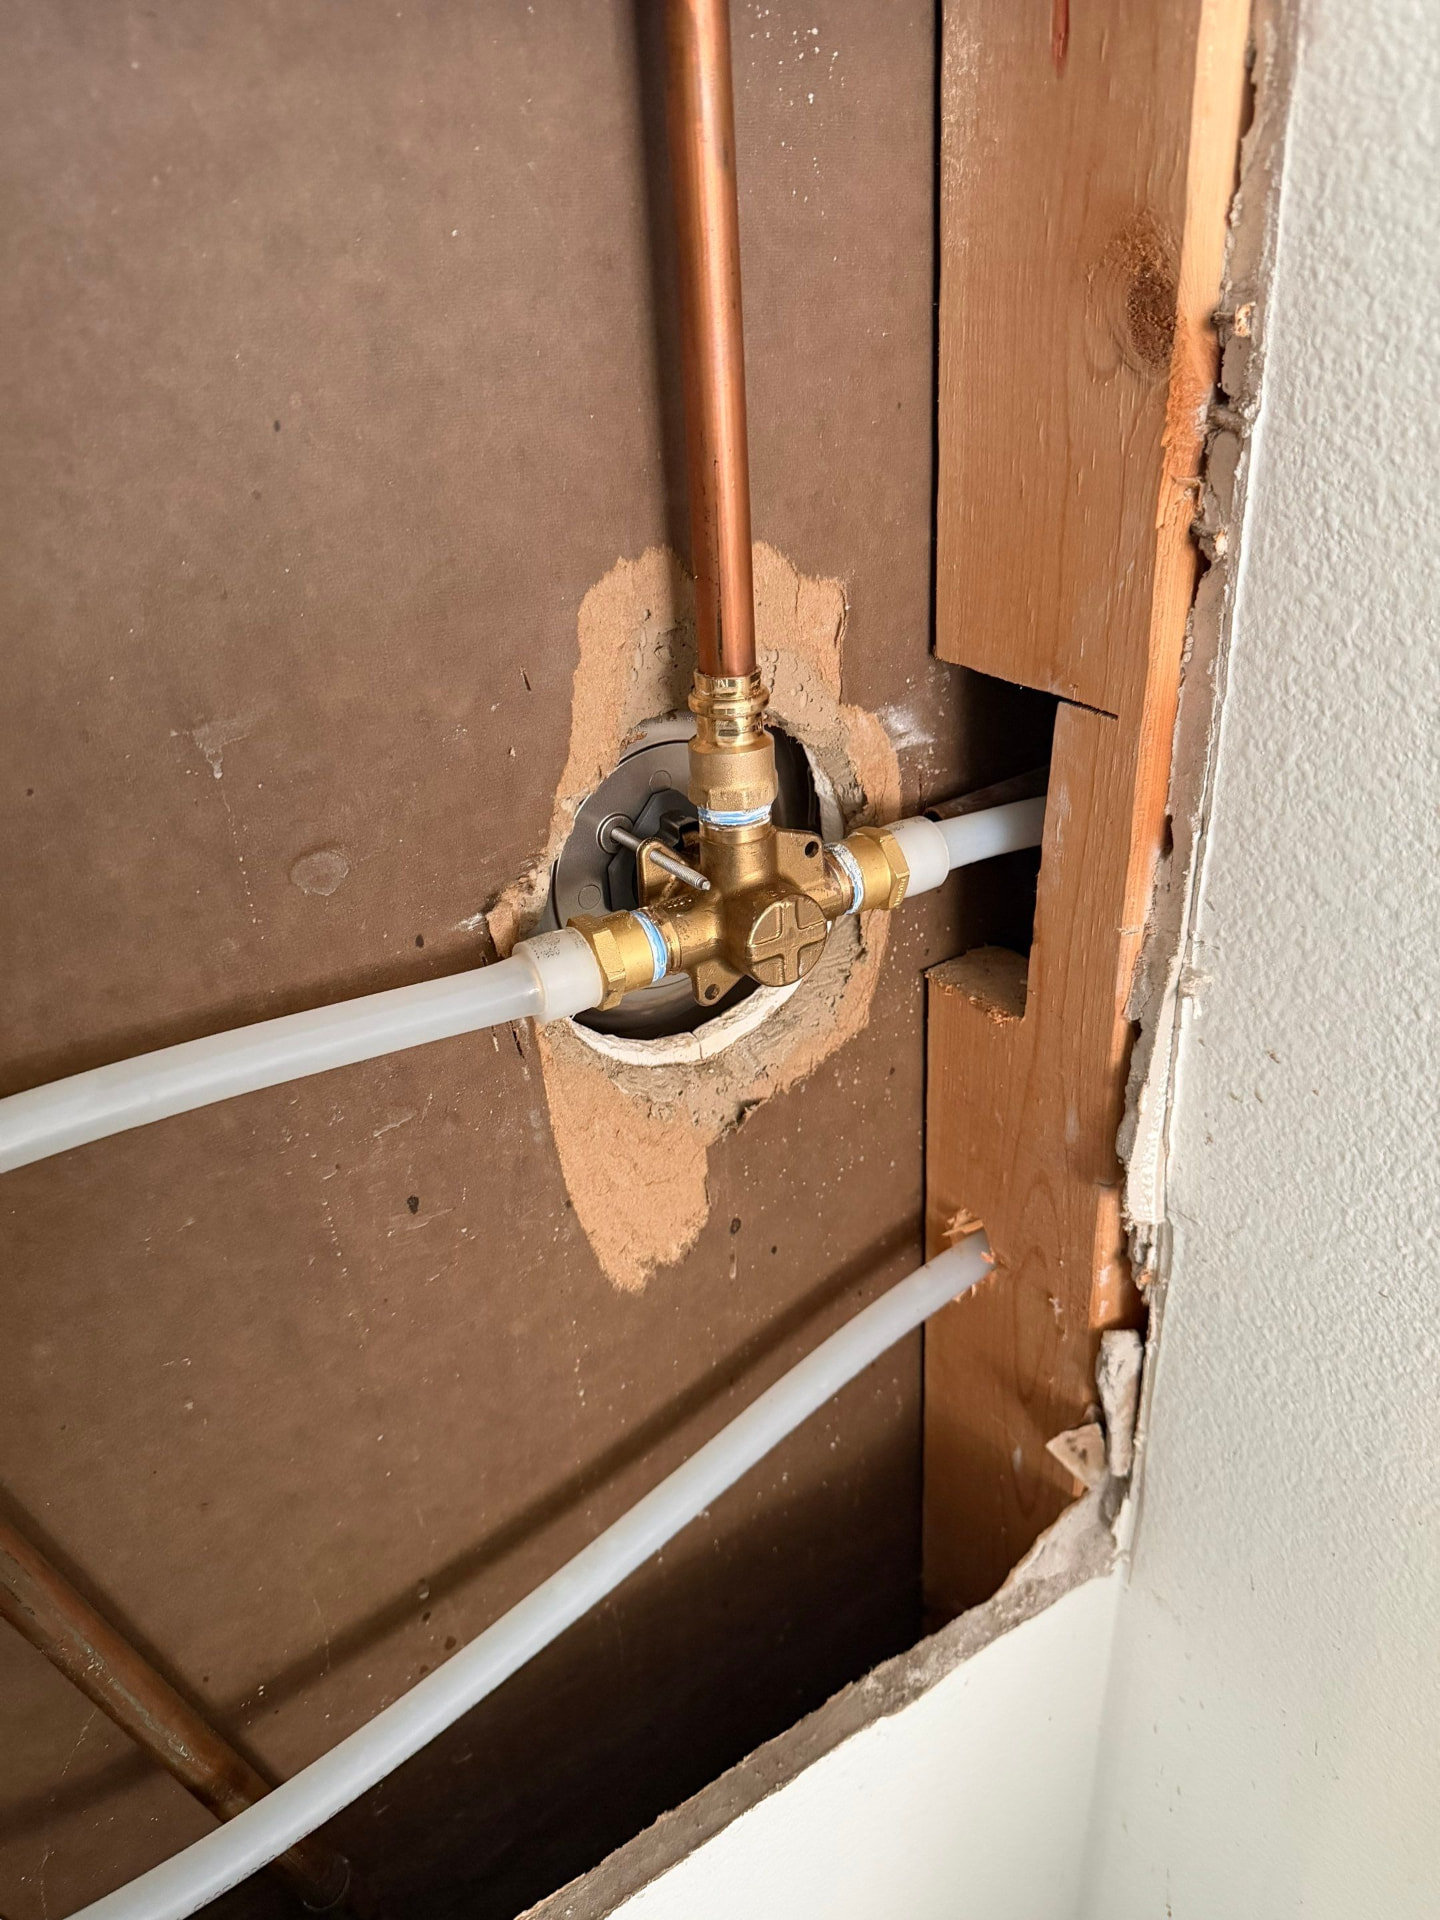
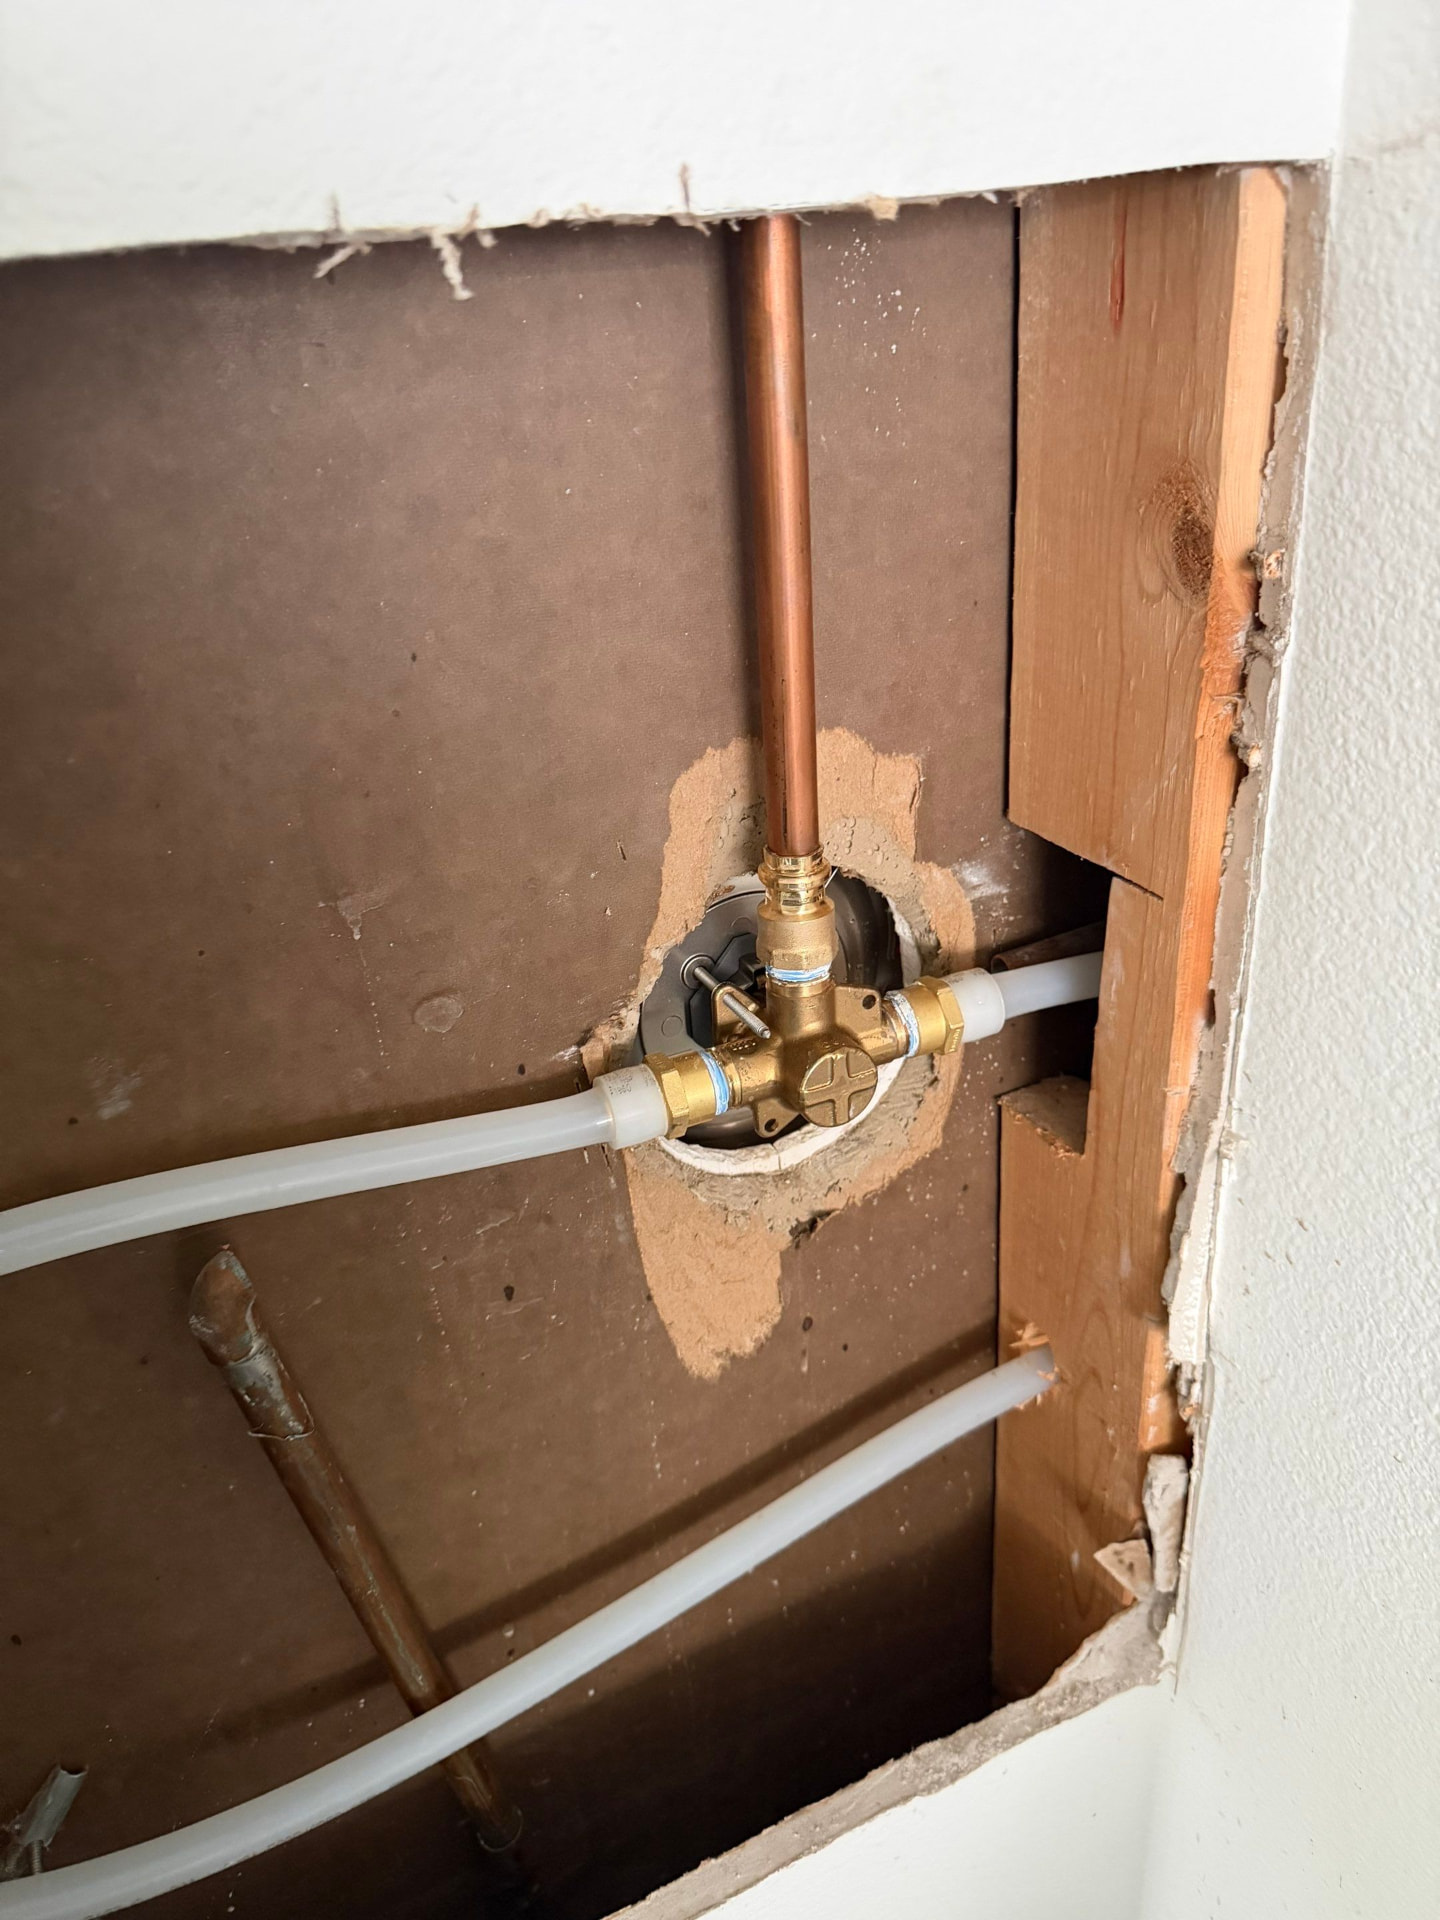
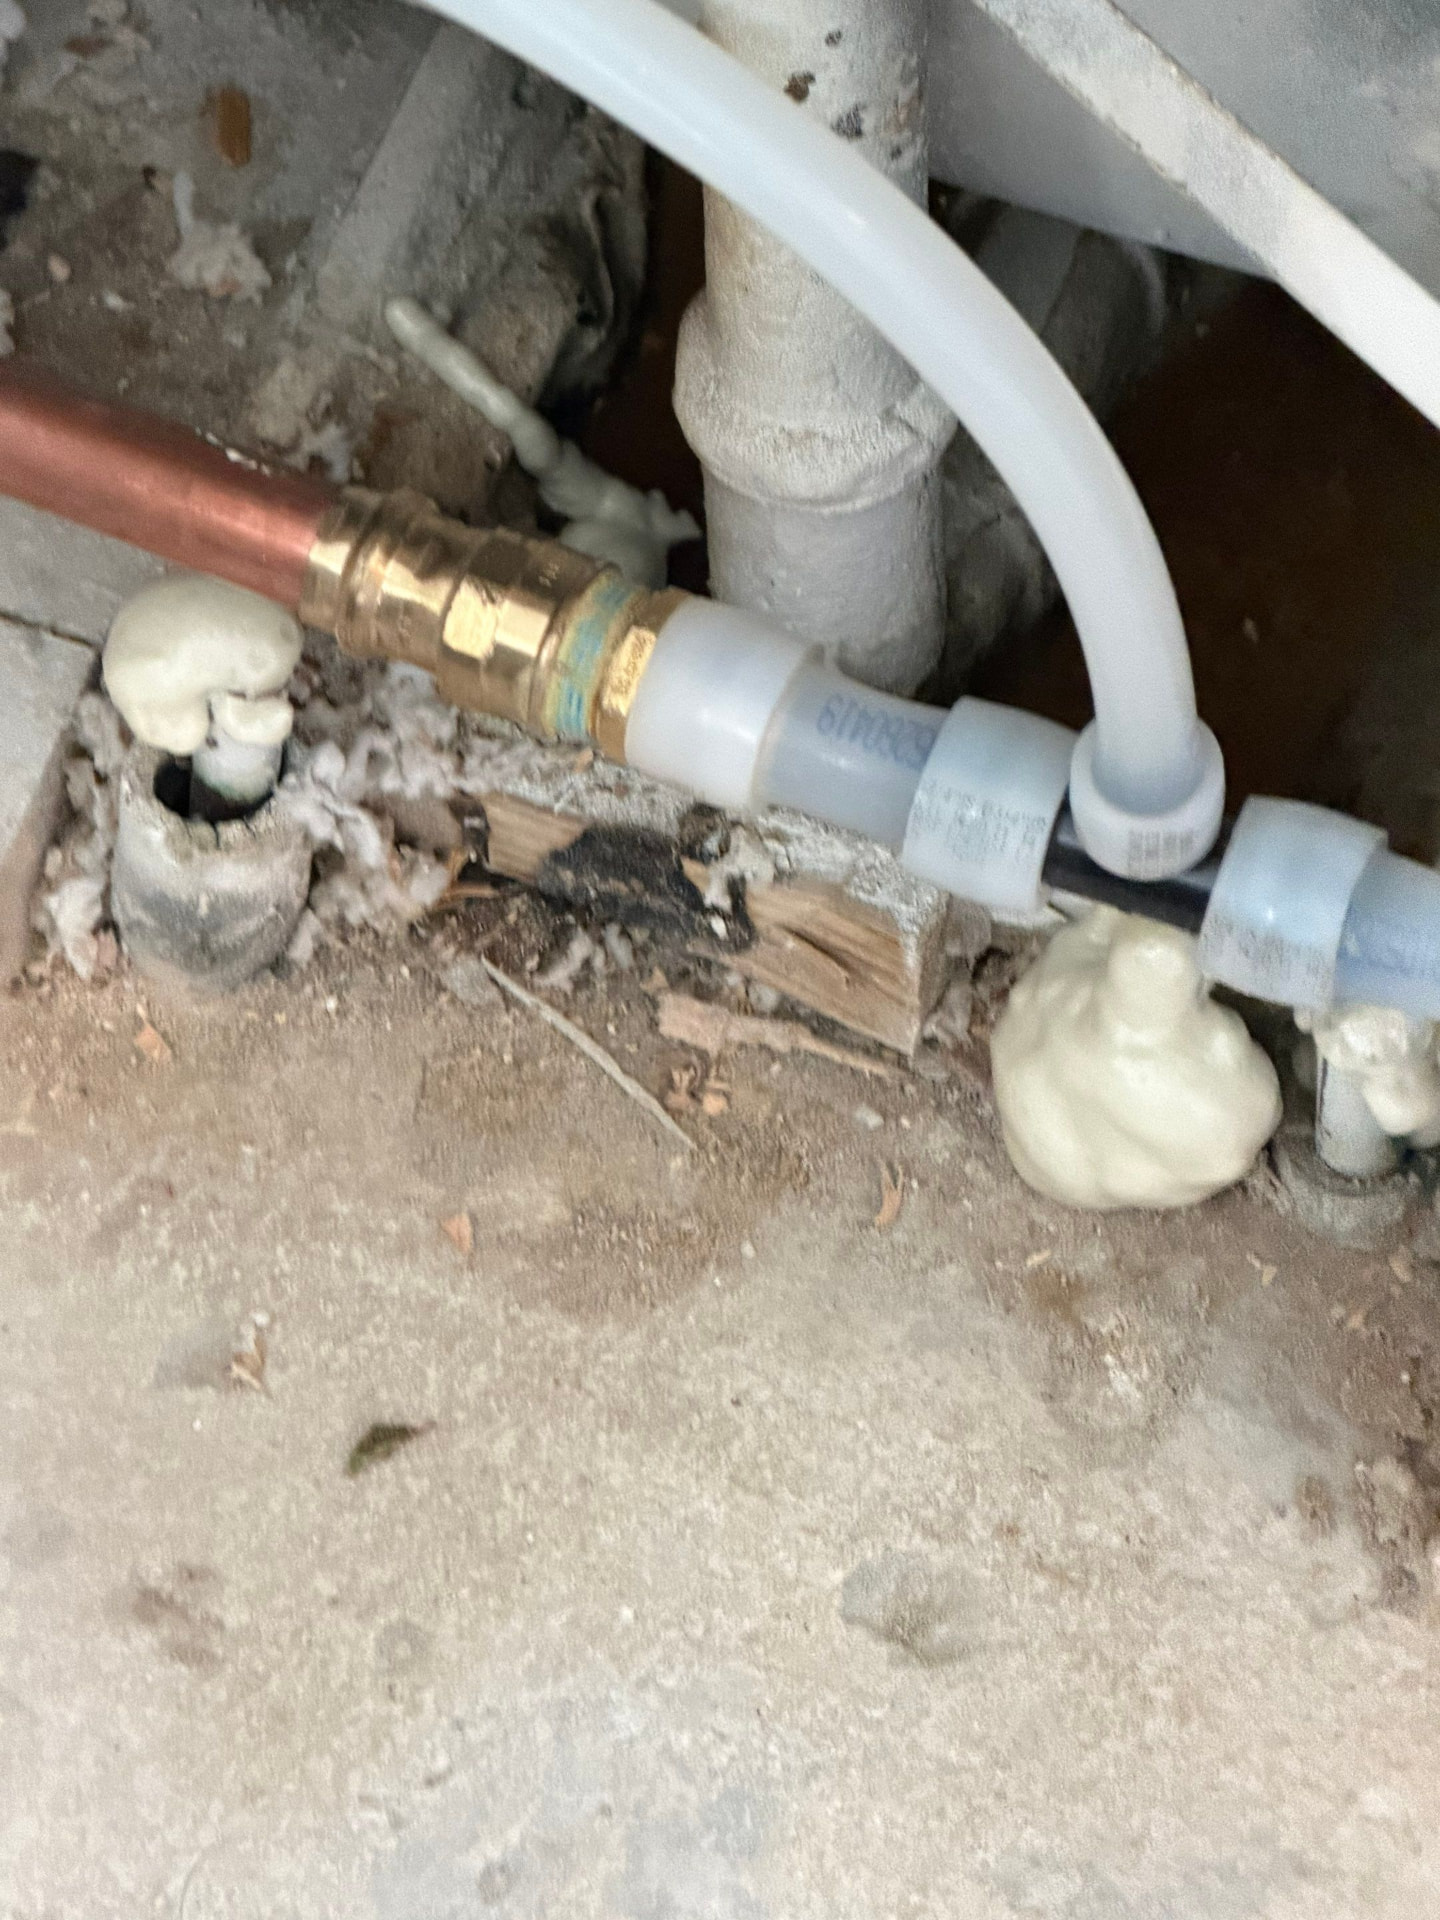
Photos from repipe work performed by Plumbing Detectives LLC. Every Venice job is documented from rough-in through inspection.
Answers
Frequently Asked Questions — Whole House Repiping in Venice, FL
If you’ve read this far, you now understand whole-house repiping in Venice better than most homeowners in this market — better than most homeowners ever get it explained. You know why pipes fail. You know when a repipe is actually necessary. You know what the process looks like, what it costs, and what to watch out for when comparing contractors. If your home has any of the pipe material concerns described on this page, or if you simply want an honest assessment of what’s in your walls, call me at 239-388-3631. I’ll come out, look at the whole system, and tell you exactly what I find before I recommend anything.
Plumbing Detectives LLC | Venice, FL | License CFC1434139
239-388-3631 | plumbingdetectivesfl.com